
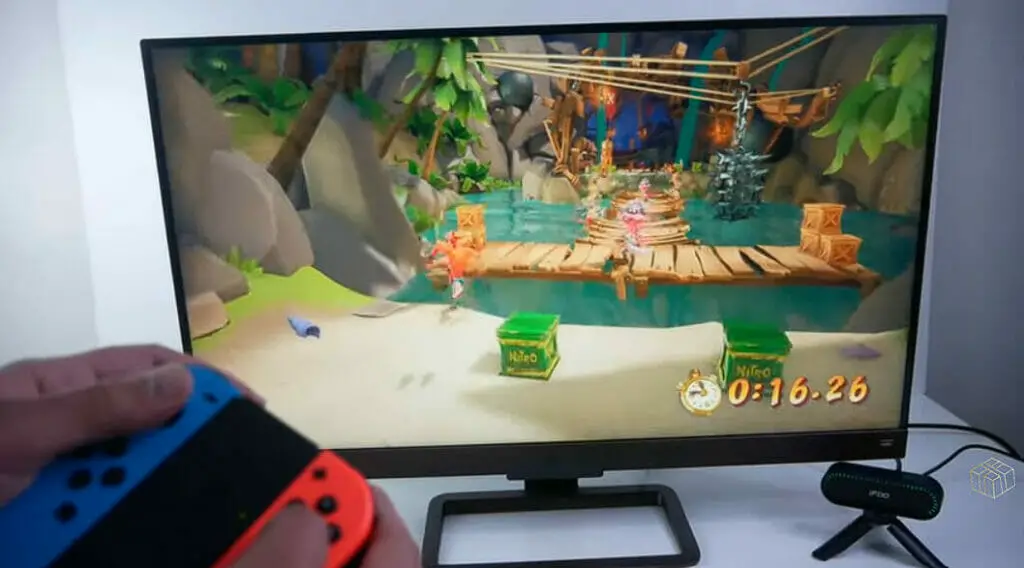
Connecting my Nintendo Switch to my TV wirelessly seemed like a challenge at first. Still, I discovered it’s possible to enjoy gaming on the big screen without the clutter of cables.
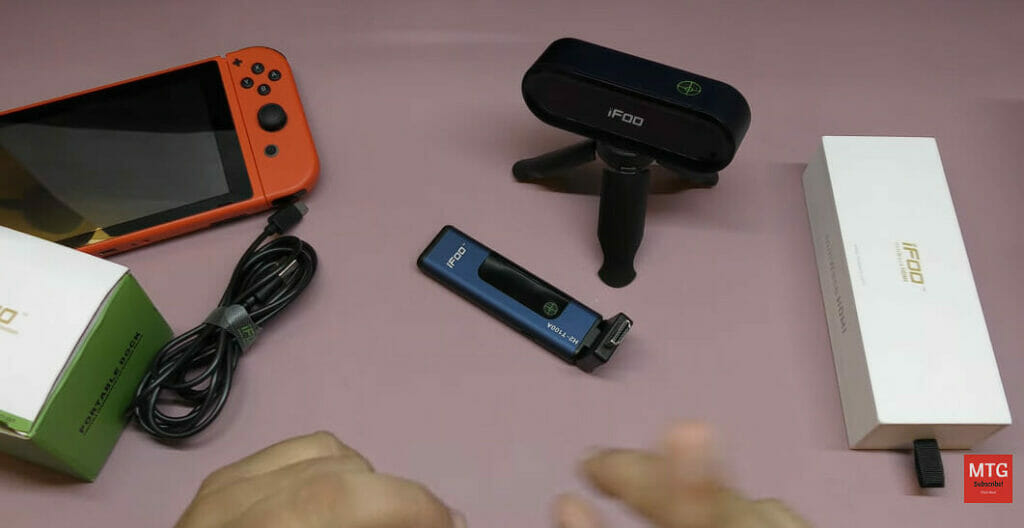
The secret behind this cable-free experience is using a wireless HDMI kit. It consists of two components: an HDMI transmitter that sends the audio and video signals from the Switch and an HDMI receiver that you connect to your TV’s HDMI port. This way, you can say goodbye to tripping over wires on your living room floor while getting an immersive gaming adventure.
So, if you want to connect your Nintendo Switch to your TV wirelessly, let me guide you through the process—no more tangled cables or fuss – just pure and uninterrupted gaming joy below.
Preparing Your Nintendo Switch for Wireless Connection
What You Need
- Nintendo Switch dock
- Wireless HDMI adapter
When connecting the Nintendo Switch to the TV wirelessly, you must get everything ready before starting, ill guide you through this below.
Setting Up Docked Mode
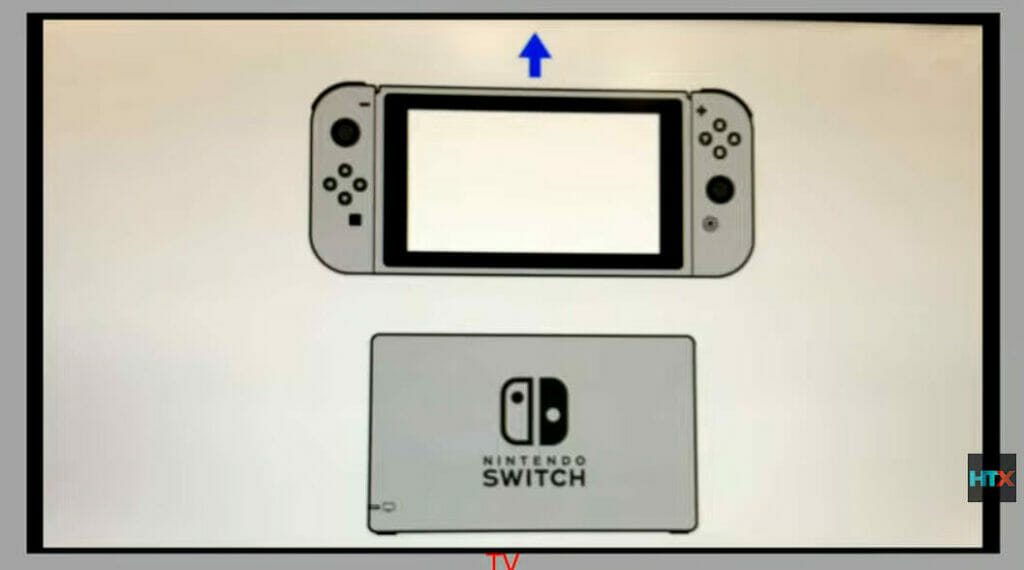
First, you must ensure my Nintendo Switch is set to docked mode. You simply place my console in the Nintendo Switch dock to do this.
I also double-checked that the HDMI cable is connected to my TV and the dock’s HDMI port. Next, I select the correct HDMI input on my TV to see the Switch’s display.
Charging Joy-Con Controllers
I don’t want my gameplay to be interrupted by low battery, so I charge my Joy-Con controllers beforehand.
Placing them on either side of the console while it’s in the dock is the easiest way to charge them. The charging process starts automatically, and I can easily monitor the charging status on my Switch’s screen.
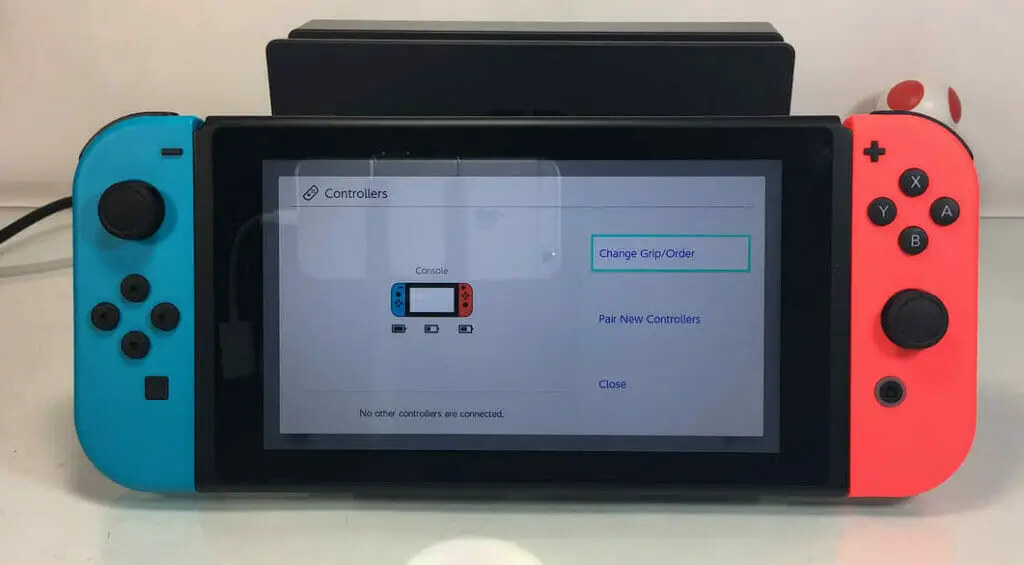
Connecting Pro Controller
If I prefer a more traditional gaming experience, I might use the Pro Controller. To connect it wirelessly, I go to Settings on my Nintendo Switch and then select Controllers and Sensors. From there, I choose Change Grip/Order and follow the on-screen prompts to sync my Pro Controller.
Connecting the Switch to Your TV Wirelessly
Selecting the Correct HDMI Input
Most TVs nowadays have multiple HDMI ports to accommodate devices like Blu-ray players, set-top boxes, and game consoles. It’s essential to plug your wireless HDMI adapter into the right HDMI input, so take a moment to verify which one you’re using.
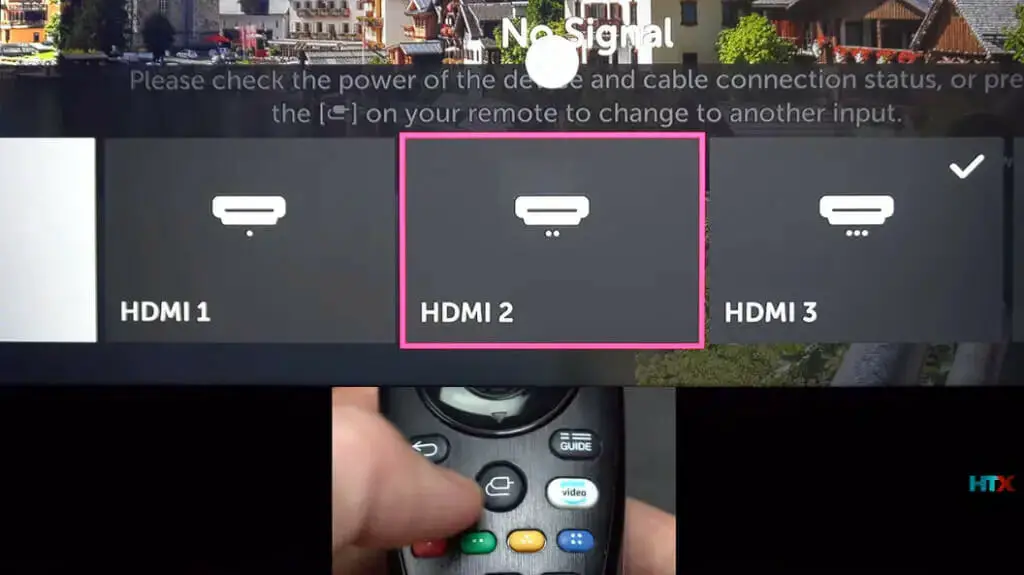
To ensure you’ve got the right input, grab your TV remote, and cycle through the available inputs until you find the one corresponding to the wireless HDMI adapter. And just like that, you have the first step completed.
Pairing Your Switch with the Adapter
Now that your TV is set to the correct input, it’s time to pair your Nintendo Switch with the wireless HDMI adapter.
Remember that not every HDMI adapter will work with the Switch, so double-check compatibility.
For pairing purposes, you’ll typically connect a wireless transmitter to your Switch’s USB-C port and an HDMI cable from the HDMI Out port on the adapter to your TV. Once connected, follow the manufacturer’s instructions to establish a wireless connection between your Switch and the adapter.
You’ll usually see an indicator light on both devices, letting you know they’re successfully paired.
Wireless Display Adapters and Compatibility
| Method | Description |
|---|---|
| Chromecast | Use a third-party app like ApowerMirror, connect it to Chromecast, and mirror your phone’s screen to the TV. |
| Miracast | Utilize Miracast screen-sharing protocol with a USB-C to HDMI adapter and an HDMI cable. |
| AirPlay | Use AirPlay with an Apple TV and a third-party app like ApowerMirror to mirror your Switch’s screen to the TV. |
Using a Chromecast for Wireless Streaming
Another device that helped me achieve a wireless display connection as Google Chromecast. This tiny device allowed me to cast my device’s screen to my TV using a Wi-Fi connection.
I was all set to go after connecting the Chromecast to my TV’s HDMI port and setting it up through the Google Home app on my smartphone.
However, I soon realized that Chromecast could only cast my Switch screen when I used compatible apps. So, while it’s a fantastic tool for casting from your phone or PC, it might not be the best pick for wirelessly connecting a Nintendo Switch to the TV.
Utilizing Miracast for Screen Mirroring
Another option I like is Miracast, a fantastic screen-sharing protocol widely used in Windows 11 devices, projectors, and smart TVs.
This cool technology allows you to cast your screen to a compatible display wirelessly. Since the Nintendo Switch doesn’t natively support Miracast, you’ll once again need a trusty USB-C to HDMI adapter and an HDMI cable to make the magic happen.
After connecting my Miracast dongle to my TV’s HDMI port and ensuring my Switch was connected to the same Wi-Fi network, I could project the screen wirelessly without any issues.
The biggest advantage of using a Miracast adapter is its compatibility with various devices and platforms, making it quite a versatile choice.
Connecting your Nintendo Switch to a Miracast-enabled TV is pretty simple. Just follow these steps:
- Plug the HDMI cable into your USB-C to the HDMI adapter.
- Connect the adapter to your Switch.
- Turn on the TV and switch to the correct HDMI input.
- Start playing your favorite Switch games on the big screen!
Employing AirPlay for Apple Devices
An AirPlay-compatible adapter is one way to connect a Nintendo Switch to a TV wirelessly. Not all adapters are compatible with AirPlay, so checking if the adapter supports it is crucial.
I could project my Switch’s display on the bigger screen by connecting an HDMI cable to the adapter and my TV and then plugging the USB-C end into my Nintendo Switch.
The only catch is that this method might not work with all television models, so double-checking compatibility’s a good idea.
Connecting Controllers and Accessories When Wirelessly Connected
When I’m all set up with my Nintendo Switch wirelessly connected to the TV, it’s essential to know how to connect the controllers and accessories. Here’s a rundown on pairing Joy-Con controllers and connecting the Pro Controller.
Pairing Joy-Con Controllers
There are two easy ways to do it.
The first one is joint pairing, where I just slide the Joy-Con controllers onto the sides of the Nintendo Switch console. They automatically pair as soon as they’re connected.
The second option is button pairing or wireless pairing.
To do this:
- I go to the HOME Menu
- Select Controllers, then Change Grip and Order.
- While the screen is displayed, I press and hold down the SYNC Button for at least one second on the controller I want to pair.
Connecting the Pro Controller
Connecting a Pro Controller is also a breeze, and I love how user-friendly it is. The simplest way is using the included USB-C charging cable.
I plug the cable into the Pro Controller and the other end into the Nintendo Switch dock. It connects almost instantly.
Alternatively, I can also connect the Pro Controller wirelessly. Using the SYNC Button on the Pro Controller, I press and hold it down for a few seconds until the controller starts searching for the console. With the console nearby, they quickly establish a connection, and I’m good to go!
Additional Considerations and Accessories
Adjusting Switch Settings for Optimal Performance
When I connect my Nintendo Switch wirelessly to my TV, there are a few settings I like to tweak.
- First, I go to the System Settings on my Switch and then navigate to the TV Settings.
- From there, I make sure the Match TV Power State is enabled – this allows my Switch to automatically turn on my TV when it wakes up from sleep mode.
- Additionally, I usually adjust the TV Resolution to match the capabilities of my external display, which enhances the overall gaming experience.
- Don’t forget to check if your Switch is also running the latest software!
Choosing the Right HDMI Cables
Invest in a high-quality HDMI cable to ensure the best connection between my Switch and TV. Remember that different types, such as High-Speed HDMI and Premium High-Speed HDMI, are available.
Depending on your TV’s capabilities, you may require a specific cable type to use features such as 4K resolution or HDR. Before purchasing, checking your TV’s manual is best to see which cable type is recommended.
Alternative Wireless Controllers
Although I enjoy using the standard Joy-Cons with my Nintendo Switch, I sometimes prefer using alternative wireless controllers for a more comfortable gaming experience.
The Pro Controller offers a more traditional gaming experience and can easily be paired with your Switch via the Controller’s settings.
Third-party controllers like the 8Bitdo SN30 Pro are also compatible with the Switch.
When looking for alternative wireless controllers, it is important to consider the following factors:
- Compatibility: Ensure the controller is compatible with the Nintendo Switch.
- Battery life: Look for controllers with long-lasting battery life.
- Ergonomics: Choose a controller that feels comfortable in your hands.
Recommended Wireless Adapters for Nintendo Switch
Let’s dive into some adapter options that can help connect your Nintendo Switch to your TV wirelessly.
I recommend the RREAKA USB-C to HDMI Adapter and the Switch HDMI Adapter Hub Dock.
RREAKA USB-C to HDMI Adapter
| Adapter | Features |
|---|---|
| RREAKA USB-C to HDMI Adapter | A plug-and-play device, Compact and lightweight, Perfect for travel |
| Switch HDMI Adapter Hub Dock | Connects Switch to TV wirelessly, Works as a multiport hub, Has several ports |
When I first tried connecting my Switch to my TV without the official dock, I discovered the RREAKA USB-C to HDMI Adapter on Amazon. This little gadget caught my attention because it’s a simple plug-and-play device that connects to the Switch’s USB-C port and provides an HDMI port for your TV.
What I love about it is how easy it makes the process. Connect the adapter to your Switch, and then plug an HDMI cable into the adapter’s HDMI port and your TV. Boom – you’re ready to play on the big screen!
Plus, it’s compact and lightweight, making it perfect for travel. If you’re not a fan of that bulky dock, the RREAKA USB-C to HDMI Adapter is a great alternative.
Switch HDMI Adapter, Hub Dock
Another impressive option I’ve found is the Switch HDMI Adapter Hub Dock. This lets you connect your Switch to a TV wirelessly and works as a multiport hub.
It has several ports, such as a USB-C port for power supply, a USB 3.0 port for peripherals, and an HDMI port for video output.
Setting up is as easy as with the RREAKA adapter – plug the hub into your Switch, connect the HDMI cable between the hub and your TV, and enjoy your game on a larger screen.
The Switch HDMI Adapter Hub Dock lets you use extra peripherals and charge my Switch while playing.
These two adapters are my favorites for achieving that seamless, wireless, big-screen experience with my Nintendo Switch. Remember to have an HDMI cable handy, and you’ll be ready. Happy gaming!
References
Websites
- Nintendo’s Official Website. https://www.nintendo.com/switch/
- Nintendo Customer Support. https://en-americas-support.nintendo.com
Video References
Tech & Design
Disney Dan
FP Good Game
Open Surprise
How To X
Marc The Geek