

If you’re like me, you’ve probably scratched your head, wondering why your mobile data isn’t working right. Well, I’m here to tell you that it could all come down to those pesky APN settings! If these settings aren’t correct or get messed up somehow it could be a pain.
Quick Overview
| Step | Android | iPhone |
|---|---|---|
| Change APN Settings | Open Settings > Mobile Networks > Access Point Names. | Open Settings > Cellular > Cellular Data Options > Cellular Network. |
| Additional Guidelines | Detailed guidelines for popular carriers like AT&T and T-Mobile will be provided. | Detailed guidelines for popular carriers like AT&T and T-Mobile will be provided. |
In this article, I’ll walk you through how to change APN settings step-by-step. I’ll cover everything from finding their locations on different devices to setting them up on different carriers.
Best Practices When Adjusting Carrier-Specific APN Settings
So here’s the thing, APN or Access Point Name is a gateway between your carrier’s cellular network and the internet. It’s what lets your smartphone interact with the world wide web. And sometimes, you might need to tinker with these settings for better connectivity.
Now onto changing these settings – be careful! Here are some best practices:
- Turn off the WiFi: Turn on your Mobile Data instead.
- Always jot down current settings before making changes: It helps if things go haywire. Although, you can also always reset it back to default.
- Make changes one at a time: Just like adjusting knobs on a sound mixer, one tweak helps identify what works and what doesn’t.
- Save each change before moving on to the next: Yes, hit save after every modification! That way, if something goes wrong, you haven’t lost everything.
As such, with patience and precision (and maybe some coffee), tweaking those APN settings will be as easy as pie!
Steps to Access and Change APN Settings on Android
Let’s dive into how you can access and change your APN settings on an Android device. It may sound a bit techy, but trust me; it’s simpler than you think!
Step 1. First, grab your Android phone and tap on the Settings app. It usually has a gear icon, so it’s hard to miss!

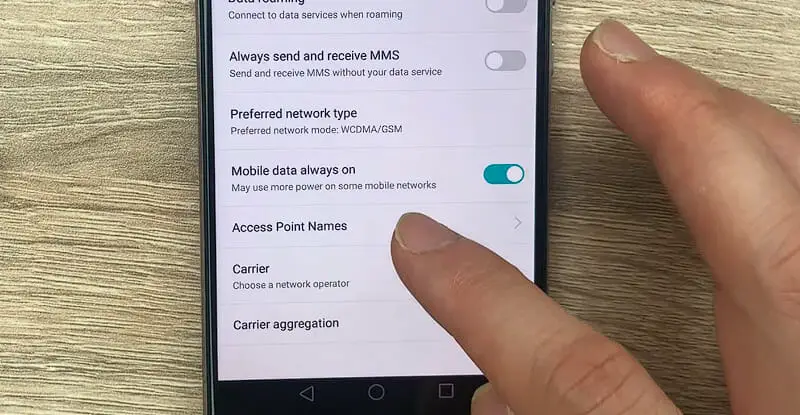
Step 2. From there, stroll down until you see Mobile Networks, Connections, or More – these names can vary slightly depending on the version of Android you’re running.

Step 3. Once you’re in there, look for Mobile Networks.

Step 4. Then you’ll see the Access Point Names. That’s where all your APN settings are hanging out.
Here comes the fun part – changing these settings. To do that:
- Tap an existing APN.
- Make any necessary changes, but be careful not to alter anything without knowing what it does. (Detailed APN settings for major carriers are listed in the following sections.)
- Tap Save when finished.
And voila! You’ve successfully navigated through your phone like a pro and tweaked some important settings.
If something doesn’t look right or match what I’ve described here at any point during this process, don’t panic! Each model of Android is a little different; that’s what makes them unique and awesome! Just use my steps as a guide; they should get you near where you need to be.
Just one last thing before we move to iPhone settings: If, by chance, while messing around in these menus, things start looking weird or not working right – don’t freak out! All phones can reset these back to default somewhere in this same menu.
So worst case scenario? You’re only one button away from returning everything to normal!
Steps to Access and Change APN Settings on iPhone
Got an iPhone? You probably love everything about it. But sometimes, you might run into snags when connecting to the internet or sending MMS messages because of APN.
All right then! Let’s get you up and running by showing you how to access and change these APN settings on your iPhone.
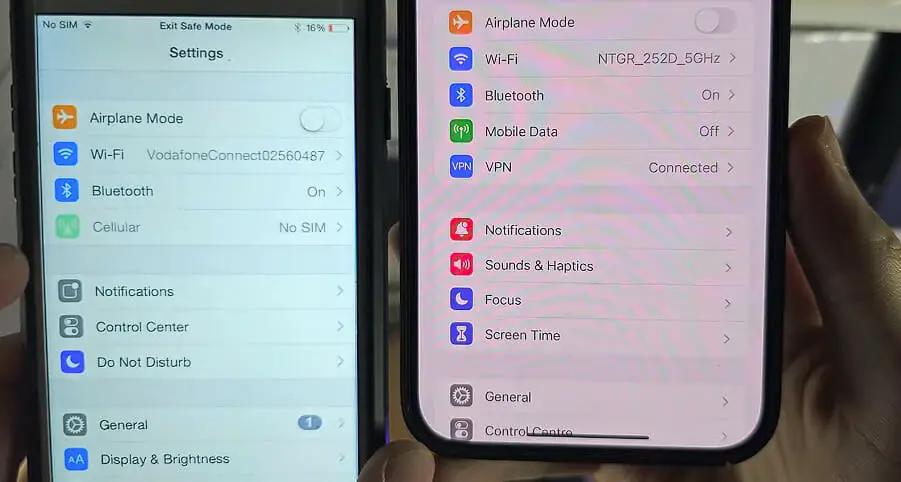
Step 1. First, open Settings on your iPhone (that gear-shaped icon).
Step 2. Scroll down till you see Cellular or Mobile Data, then tap it.
Step 3. Now select Cellular Data Options (or Mobile Data Options).
Step 4. Here comes the important bit: Tap on Cellular Network (or Mobile Data Network).
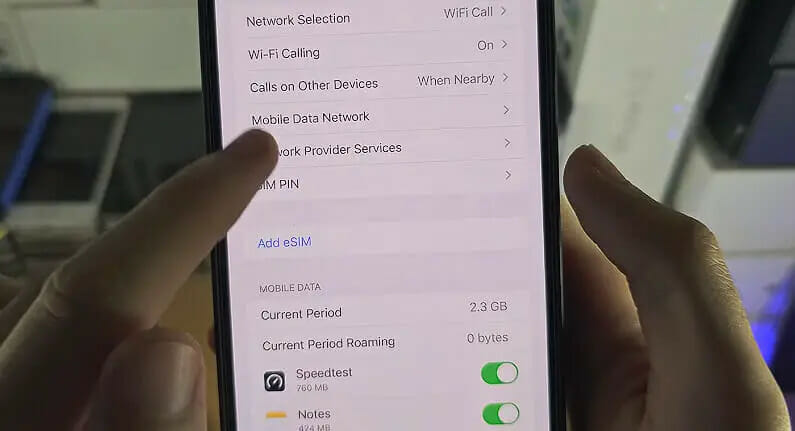
Voila! There are your current APN settings staring right back at you!
Now that we’re here, let’s talk about changing these pesky settings:
- If allowed by your carrier, tap each field and enter the details they provided. (Or try following the detailed APN settings I provided in the next section).
- Make sure all information is entered correctly (double-check never hurts).
- Once done, don’t forget to hit the Save button in the top right corner.
And there you have it! Changing APN Settings on an iPhone doesn’t have to be rocket science! Remember though – if you’re uncomfortable doing this yourself or something goes wrong – don’t hesitate to ask for professional help from Apple Support or your carrier’s customer service team.
So go ahead now – tweak those settings and enjoy uninterrupted surfing and messaging!
APN Settings by Major Carriers
APN Settings for AT&T
| Setting | Value |
|---|---|
| APN Name | ATT NXTGENPHONE |
| APN | NXTGENPHONE |
| Proxy | |
| Port | |
| Username | |
| Password | |
| Server | |
| MMSC | http://mmsc.mobile.att.net |
| MMS Proxy | proxy.mobile.att.net |
| MMS Port | 80 |
| MCC (Mobile Country Code) | 310 |
| MNC (Mobile Network Code) | 410 |
| Authentication Type | none |
| APN Type | default, mms, supl, hipri |
| APN Protocol | IPv4 |
| APN Roaming Protocol | |
| Bearer | |
| MVNO Type | |
| MVNO Type |
APN Settings for Verizon
| Setting | Value |
|---|---|
| APN Name | Verizon |
| APN | vzwinternet |
| Proxy | |
| Port | |
| Username | |
| Password | |
| Server | |
| MMSC | http://mms.vtext.com/servlets/mms |
| MMS Proxy | |
| MMS Port | 80 |
| MCC (Mobile Country Code) | 310 |
| MNC (Mobile Network Code) | 12 |
| Authentication Type | |
| APN Type | internet+mms |
| APN Protocol | |
| APN Roaming Protocol | |
| Bearer | |
| MVNO Type | |
| MVNO Type |
APN Settings for T-Mobile
| Setting | Value |
|---|---|
| APN Name | T-Mobile |
| APN | fast.t-mobile.com |
| Proxy | |
| Port | |
| Username | |
| Password | |
| Server | |
| MMSC | http://mms.msg.eng.t-mobile.com/mms/wapenc |
| MMS Proxy | |
| MMS Port | |
| MCC (Mobile Country Code) | 310 |
| MNC (Mobile Network Code) | 260 |
| Authentication Type | |
| APN Type | default, supl, mms |
| APN Protocol | IPv6 |
| APN Roaming Protocol | |
| Bearer | |
| MVNO Type | |
| MVNO Type |
APN Setting for Lycamobile
| Setting | Value |
|---|---|
| APN Name | T-Mobile |
| APN | fast.t-mobile.com |
| Proxy | |
| Port | |
| Username | |
| Password | |
| Server | |
| MMSC | http://mms.msg.eng.t-mobile.com/mms/wapenc |
| MMS Proxy | |
| MMS Port | |
| MCC (Mobile Country Code) | 310 |
| MNC (Mobile Network Code) | 260 |
| Authentication Type | |
| APN Type | default, supl, mms |
| APN Protocol | IPv6 |
| APN Roaming Protocol | |
| Bearer | |
| MVNO Type | |
| MVNO Type |
Remember though – these are just general guides based on common setups! Yours might be a bit different depending on your device or software version. So, make sure you double-check everything before making any changes.
And there you have it – a simple breakdown of how to change your APN settings for some of the biggest carriers. Don’t be scared to jump into those settings; you’ve got this!
Troubleshooting: What to Do If Internet Stops Working After Changing APN
Uh-oh, got some hiccups after changing your APN settings? Don’t fret! I’m here to help you pinpoint the issue and get back online without a hitch.
First things first, double-check your new APN settings. It’s easy for typos or incorrect values to sneak in when entering information manually. Make sure every detail aligns with the recommended settings from your carrier.
If all seems well there, it’s time to play detective. Try turning off your mobile data and then switching it back on again. Sounds too simple? You’d be surprised how often this little trick can kick-start things into gear!
Still no luck? Let’s try resetting those APN settings back to default. Here are the steps:
- Open Settings
- Tap on ‘Mobile Networks’
- Select ‘Access Point Names’
- Look for three dots in the top-right corner (or More)
- Choose ‘Reset to default’
Boom! You’ve just rolled back all changes made during this adventure.
Now, if you’re still staring at that pesky “No internet connection” message, it might be time to reach out to our friends at the customer support of your network provider for further assistance.
Remember, while tweaking these settings can improve performance, they can also cause connectivity issues if not done correctly—a double-edged sword!
So don’t be disheartened if you’ve run into a snag; even experts hit roadblocks sometimes!
References
Websites:
- AT&T Support. https://www.att.com/support/wireless/
- T-Mobile Support. https://www.t-mobile.com/support/
- Verizon Support. https://www.verizon.com/support/
- XDA Developers. https://www.xda-developers.com/
- Android Central. https://www.androidcentral.com/
- Lifewire. https://www.lifewire.com/
Video References:
APN Settings
Alfve