Activating your laptop’s or phone’s wireless capability when off can initially appear complicated. However, it’s easy with a functional wireless card and a basic understanding of your settings.
Key Takeaways (For Windows + Mac)
- Wireless Switch: If present, locate and turn on the physical wireless switch.
- Key Combinations: Use specific key combinations for wireless control without a physical switch.
- Airplane Mode: Check that Airplane Mode is turned off.
- Troubleshooting: Seek further help if issues persist after these steps.
I will go into detail with images below for both Windows and Mac.
Option 1. Hardware Switch for Wireless Capability
Some devices have a hardware switch to turn their wireless capability on or off.
It might be in the form of a button, toggle switch, or a key. Regardless, it’s supposed to make it easy to turn the wireless on or off quickly; if you’re the switch is turned off, you might get frustrated figuring out why the wireless won’t turn on.
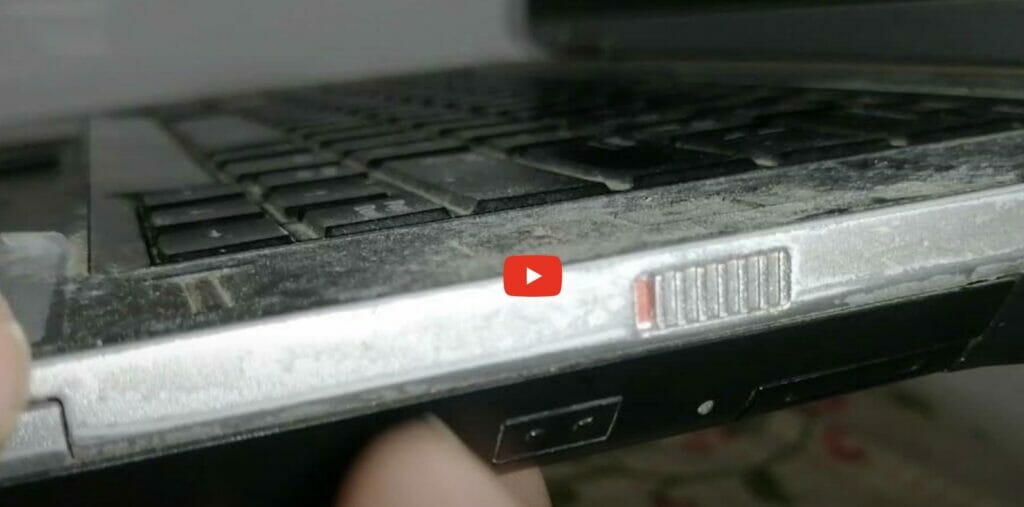
If the hardware switch is turned on, and you’re still struggling to turn the wireless on, i.e., on the software side, I’ll show you what to do further. Below is a picture of a wireless hardware switch on some older laptops. It’s usually on one side or the front.

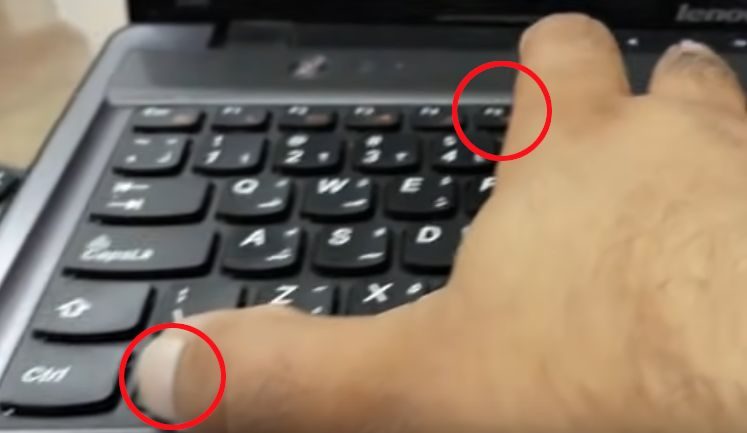
Instead of a toggle switch, you might have a key on the keyboard to switch the wifi on/off. Usually, it’s one of the function keys, such as F2, F5, F9, or F12; in this case, you may have to press the Fn (function) key, usually at the keyboard’s bottom left, plus the number. Depending on the operating system on the device, you should also get an indicator on the screen and a notification.
For example, on some Lenovo laptops, the combination to turn the wireless capability on and off is Fn+F5.
The WiFi Indicator
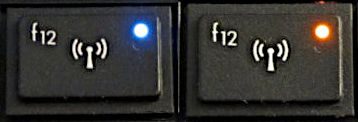
A Wi-Fi light turns on on some computers when the wireless capability is active. It might look something like one of these:

The wifi icon is not standard, but it usually shows waves emanating from a spot, antenna, or radio tower or is an umbrella icon.
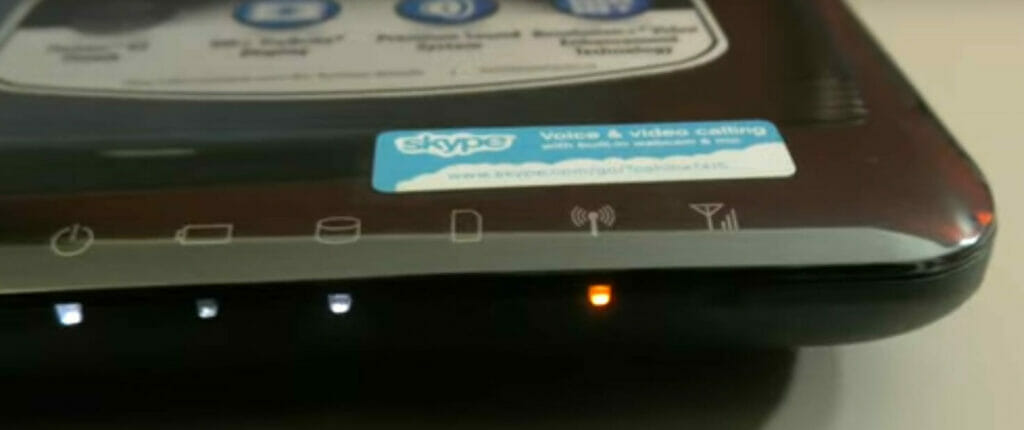
If your laptop has hardware light indicators, they might include one for the wireless connection. It should be lit, as shown below.
Option 2. Windows Computers – OS Settings for Wireless Capability
The software settings for wireless capability will differ according to the operating system and version.
Ensure the hardware wireless switch is turned on first if you want to use the wireless capability. Here, I will assume the switch is turned on, but the computer is showing that it is disabled, and we will only consider the Windows system.
Airplane Mode is Turned On
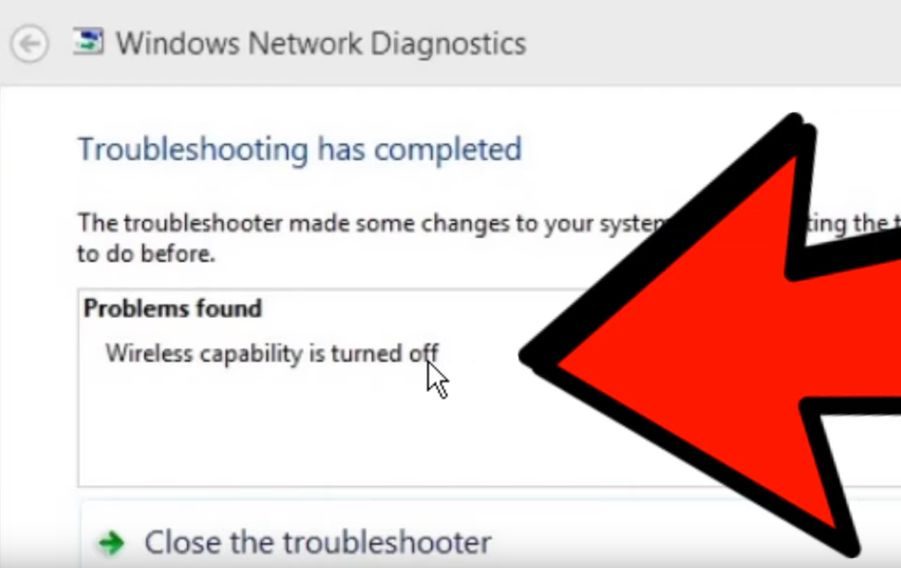
Before opening the network settings, check whether Airplane Mode is turned on, as this will turn off the wireless. If so, as shown below, click to turn it off. Now, wifi should turn on, and you will see its box turn from grey to blue.
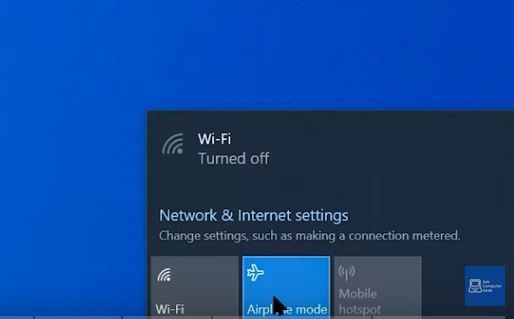
This is how it should look instead:

Wifi Not Lit or Showing
This section only applies if the wifi fails to turn blue or doesn’t show.
Open up Devices and look under Network Adapters. Click on the wifi adapter. Right-click on it and uninstall the device.
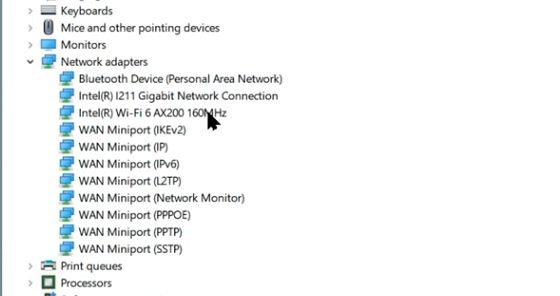
Confirm the uninstallation but DON’T delete the driver software for your device; otherwise, you will have to download and re-install it.
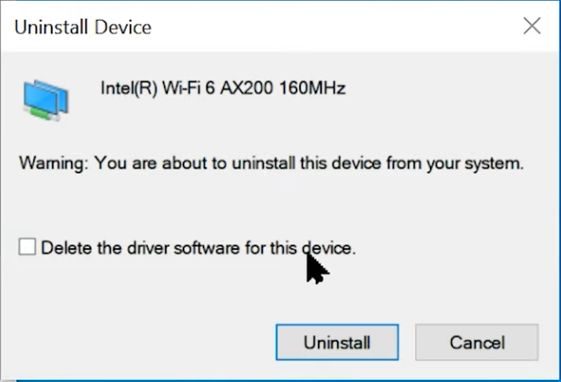
The device will disappear from the list of network adapters after uninstalling it, but the software should remain because we will re-install it.
Now, select Action > Scan from the menu bar for hardware changes.
After doing this, the hardware will show up again. The wifi icon should also be showing now. In case it doesn’t, right-click on the listed wireless hardware and choose to Update it, then choose to Browse the computer for drivers.
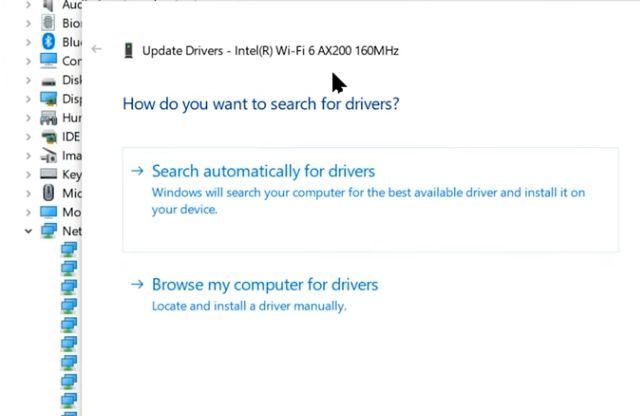
Choose to pick from a list of available drivers. Choose the newest driver from the list. If the dates are not showing, try them one at a time to see which one works. To install one, click on it and select Next.
Enabling WiFi on Older Windows Versions
On older versions of Windows, you will probably see that wifi is disabled in the network settings (or Network & Internet Settings). Right-click on it and select Enable.
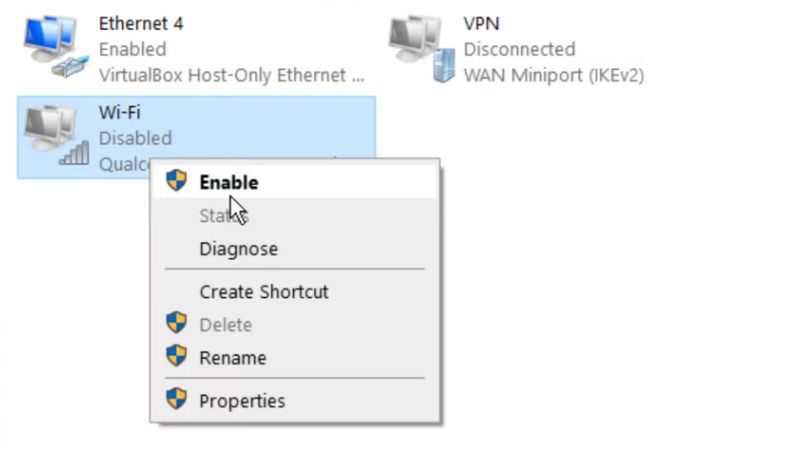
If, after enabling it, it shows “not connected,” then right-click again and select Connect/Disconnect.
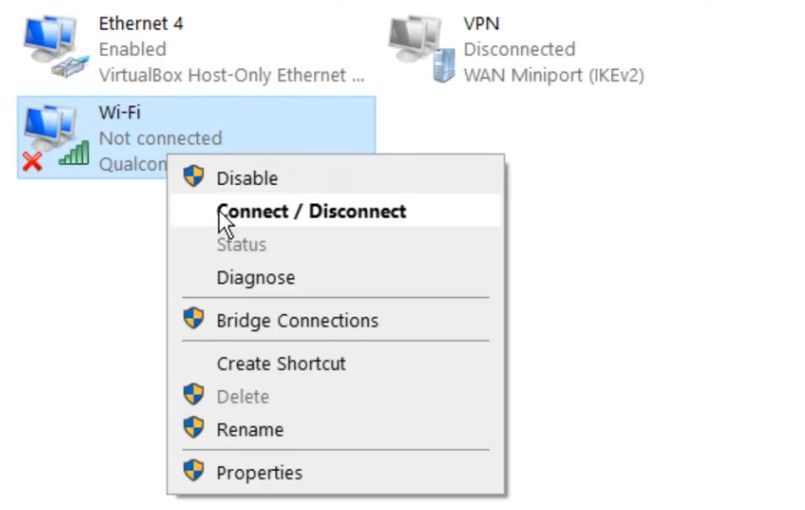
If it fails to connect, right-click again and select Properties this time. Then, in the Properties window, select Configure.
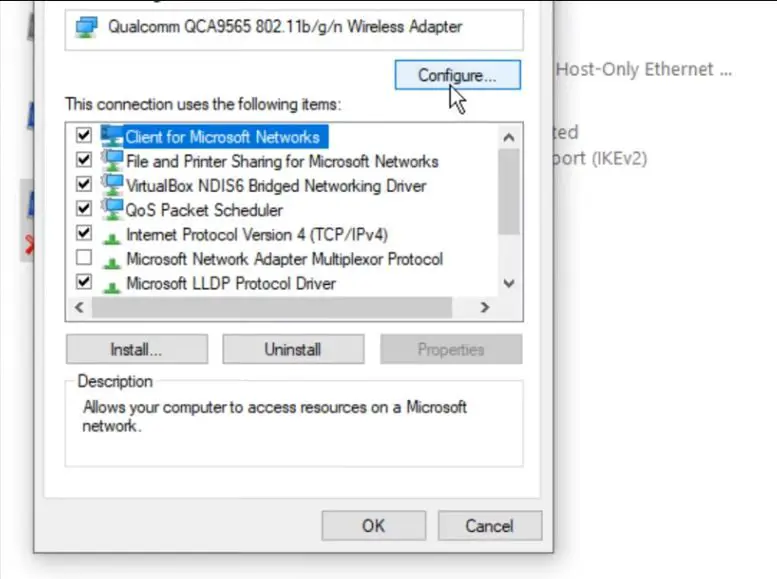
In the Configuration window, select Power Management.
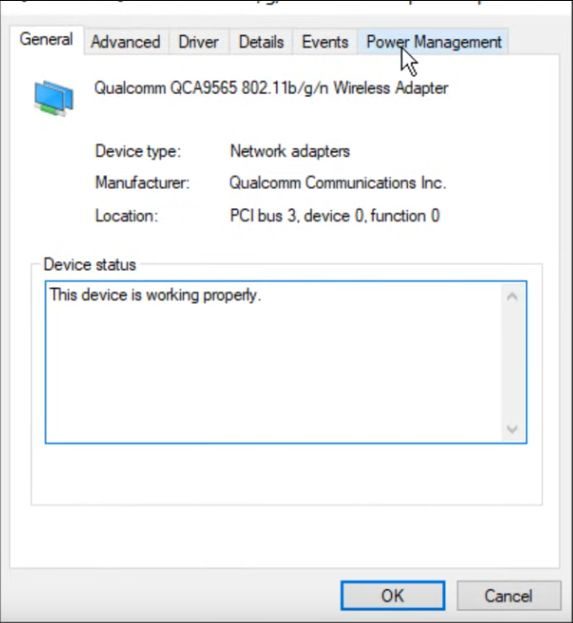
The above example shows the device status: “This device is working properly.” So, it might be a power management issue. Under Power Management, if “Allow the computer to turn off this device to save power” is checked (as shown below), uncheck it, then click OK.
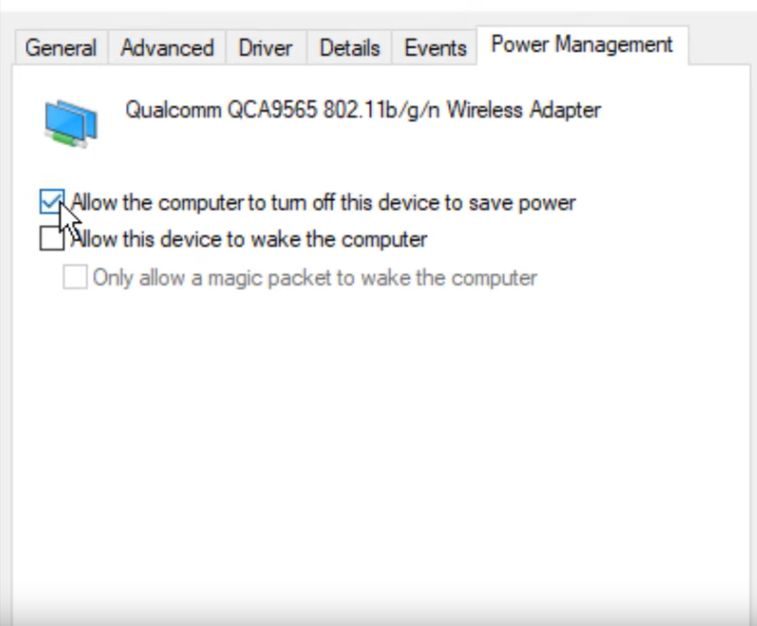
The wireless capability should now be active. If it’s still not working, return to the Properties option and click “Internet Protocol Version 4 (TCP/IPv4)” without deselecting it. Ensure that “Obtain an IP address automatically” and “Obtain DNS server address automatically” are selected.
Advanced Internet Settings
If the problem persists, you may need to restore the Advanced Internet Settings or use the Task Manager to diagnose the problem, which is beyond the scope of this article.
If the wireless capability still doesn’t turn on, there might be a problem with the hardware switch or the wireless card inside the computer.
Option 3. Mac/Apple Computers – OS Settings for Wireless Capability
Here’s a detailed step-by-step guide on turning on the wireless capability on a Mac:
- Apple Menu: Locate the Apple logo, which is at the top-left corner of the screen. This is the main menu for your Mac computer. Clicking on it will bring up a drop-down menu with several options.
- System Preferences: From the drop-down menu, select “System Preferences.” This is where you can adjust the settings for your Mac. System Preferences allows you to tweak everything from your desktop background to how your mouse or trackpad works.
- Network Preferences: Inside the System Preferences window, you’ll find several icons, each representing a different aspect of your system’s settings. Look for the one labeled “Network” and click on it. This opens up your Network settings, where you can manage all your Mac’s network connections.
- Select Wi-Fi: In the Network window, you’ll see a panel on the left side with several options like Wi-Fi, Ethernet, Bluetooth, etc. Click on the “Wi-Fi” option.
- Turn on Wi-Fi: You’ll see the Wi-Fi settings on the right side of the Network window. Here, if your Wi-Fi is off, you should see a button that says “Turn Wi-Fi On.” Click on this button to enable Wi-Fi on your Mac.
- Choose Network: Once the Wi-Fi is turned on, your Mac will search for available wireless networks. These will appear in a “Network Name” drop-down menu. Click on this menu, and select the network you want your Mac to connect to.
- Enter Password: If your chosen network is secured, you will be asked for a password. You should enter the password in the provided text box and click “Join.” Your Mac should then connect to the Wi-Fi network.
If you can’t see the Wi-Fi option, it’s grayed out, or you’re having other issues with your wireless connection, this could indicate a problem with your Mac’s wireless card or the operating system. Some potential solutions for this issue include:
- Restart your Mac: Restarting your Mac can sometimes resolve many minor issues.
- Check for OS updates: Ensure your Mac’s operating system is current. You can check for updates by going to the Apple menu > About This Mac > Software Update.
- Reset PRAM/NVRAM and SMC: Resetting the PRAM/NVRAM and the SMC can solve various Wi-Fi-related issues. Please note that these are more advanced options, so you should only attempt them if you feel comfortable doing so or under the guidance of Apple Support.
- Contact Apple Support: If you cannot solve the issue alone, it might be best to contact Apple Support or bring your Mac to an Apple Store for further assistance. They have the tools and knowledge to diagnose and fix your problem.
Troubleshooting FAQs
What if there’s no physical wireless switch on my laptop?:
If there’s no physical switch, your laptop likely uses a function key or a combination of keys to control the wireless capability. Refer to your laptop’s manual or the manufacturer’s website for instructions.
What should I do if I can’t find the function key to turn on the wireless capability?
The specific key can vary depending on the laptop model. Often it’s a combination of the Fn key and one of the function keys (F1-F12). Look for a key with a wireless icon. If you can’t find it, consult your laptop’s manual or the manufacturer’s website.
What if I’m sure the wireless capability is on, but I still can’t connect to the internet?
Try resetting your router or modem. If other devices can connect, your laptop might have a problem. Run the network troubleshooter specific to your operating system, or update your network driver.
What should I do if the Airplane Mode won’t turn off?
Try restarting your laptop. Check your laptop’s network settings or consult the manual if it doesn’t work. If you’re still having problems, consider contacting tech support.
What if I’ve followed all these steps and still can’t turn the wireless capability on?
If you’ve tried everything and still can’t connect your wireless card might be faulty. Contact your laptop’s manufacturer or a professional technician for further help. It might be time for a repair or replacement.
References
Video References
Adamant IT
Ask a Computer Geek
Blue Kap
Jody Bruchon Tech
Patriot Contraptions
The Geek Page
The Laptop Barn
Tikfortok

