
Endoscope cameras have revolutionized how we examine confined spaces. Originally, these were meant for medical purposes, wielded by surgeons to check a patient’s digestive tracts. Now, the scope of its usage has expanded greatly. People have begun to use the device to reach otherwise unreachable places like pipelines or vents. While these can be bought from retail stores, making a DIY endoscope camera is easier than you might anticipate. You may see the best endoscope camera here before deciding whether you will opt to buy or proceed with DIY project.
DIY Endoscope Camera
But before we dive into the detailed instructions, you may want to check this article discussing what is an endoscope camera. DIY endoscope cameras might not be exactly like what you can get from stores, but they can get the task done. However, you might need to gather a few things before starting the project. Here’s what you’d need.
- A Thin Camera: A single unit of a tiny camera can either be bought from the store or can be plucked from a device. For example, if you own an old laptop or a smartphone that has become defunct, you can dismantle the whole thing and pluck the camera out. The same could be done if you own an old webcam.
- A Small Light: Since you’d be sending the device to confined spaces, possibly engulfed in pitch darkness, you’d indeed need something to light the way. A white LED would do the trick. Make sure it’s relatively smaller than the camera yet bright. Ultimately, the sizes of both the camera and the light would depend on how the endoscope camera will be used.
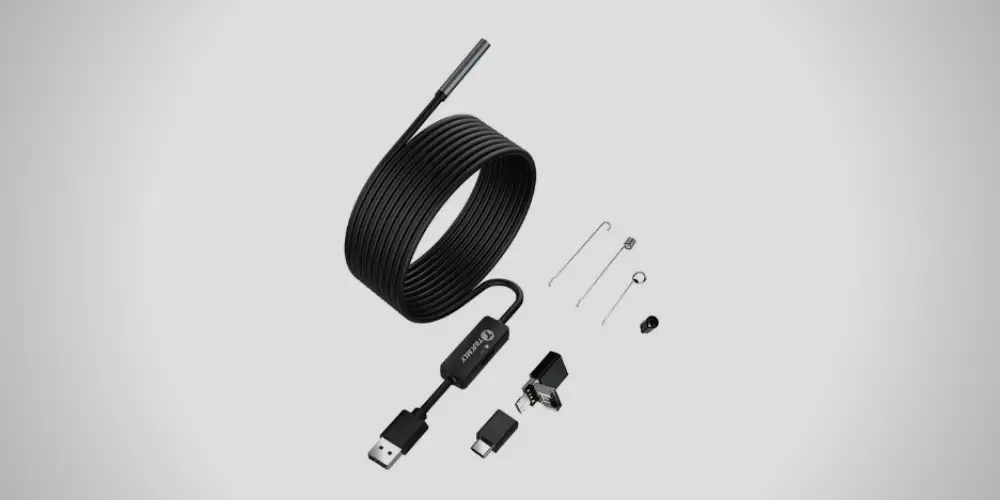
- A Long USB Cord: This will be the main body of the camera, the length of which would again depend upon how you would be using the endoscope. But you can find plenty of long USB cords on the market. Keep in mind that you would be cutting off one end of the chord, so choose a length accordingly.
Now that you’ve gathered the components needed to make the endoscope camera let’s get down to the real thing.  Step 1: Grab a USB cable and cut off the USB-mini Male connector of the same. Pick the USB-A male connector or USB 2.0, and feel free to ditch the other portion. This part of the wire will be used to power the system. Peel off some rubber of its upper portion to reveal four wires, red, black, green, and white. Separate the black, red wire (the power source), and the green, white (the USB). (1)
 Step 2: Connect the camera with these wires. Use insulation tape to secure the connection. Wrap it around the nexus at least thrice to be sure. Attach a tiny LED light into the mix, and secure it with the tape. Now, on one end of the wire, you’ll have a camera and a light neatly attached, while on the other end, there will be a USB 2.0. Turn it to an on-the-go adapter by connecting a micro USB.
  Step 3: Connect the OTG to a functioning smartphone. Before doing this, you can install a suitable app on your phone, such as “USB Camera” for Android users. Once the app has been downloaded, follow the instructions on how to establish a connection between your DIY camera and your phone. Once done, the phone’s screen will display everything that the camera sees. You can click pictures, and record videos, as you normally do. The only difference is, you can now send the camera to the most obscure locations and find things that you have lost. (2)
 Tip: You can extend the length of the USB cable by linking two or three together. This can come in handy when you’re trying to send your camera down to pipelines. Although a standard long chord will do the trick, you can customize it to your unique needs.
Final Words
A DIY endoscope camera would be vastly different from what these manufacturers sell. However, it can perform its basic function magnificently, as long as all the connections have been securely made. It might need some trial and error, especially if you’re doing this for the first time, but in time, you’d construct an efficacious endoscope system and begin surveilling vents and other confined spaces with much ease. Have you decided to make one for yourself? or buy one of the best in the market? If you decide for the latter, you may want to check here where to buy an endoscope camera. See you on our next article!
References
(1) USB-mini Male connector – https://learn.sparkfun.com/tutorials/connector-basics/usb-connectors(2) OTG – https://www.coolblue.nl/en/advice/what-is-usb-otg.html