

What The Lifeline Phone Program Actually Delivers
Let's be upfront: the Lifeline program isn't a premium phone package. It provides a basic service, and understanding that from the start is key. I've seen too many people get their hopes up about the $9.25 monthly discount, only to be let down. So, let's get real about what you're getting.
Most people on Lifeline opt for a cellphone instead of a landline. Makes sense, right? Landlines keep you tethered, while a cellphone keeps you connected wherever you go. This is crucial for job hunting, medical appointments, and staying in touch with loved ones. Every Lifeline user I've talked to has emphasized how important this mobility is.
But here's the catch: data limits are usually pretty strict. Forget streaming movies or endless social media scrolling. Your data is primarily for essential communication: texts, emails, and some light web browsing. One user told me she meticulously budgets her data, relying on the library's Wi-Fi for anything beyond the basics.
Understanding Lifeline's Impact and Limitations
To really grasp Lifeline's impact, it helps to look at the numbers. As of 2021, 94% of Lifeline participants used mobile services. This shows how vital wireless connection is for this population. The program's monthly $9.25 subsidy helps, but it often means plans with limited voice minutes and data. This is a genuine concern in our data-driven world.
It's worth remembering that Lifeline serves millions of Americans, including veterans, people with disabilities, and those living on tribal lands. For many, it's a critical lifeline. Other programs, like the Affordable Connectivity Program (ACP), are designed to work alongside Lifeline and address broader connectivity issues. Learn more about the Lifeline program.
Boosting Your Connectivity With ACP
This is where the ACP comes into play. Combining Lifeline and ACP can significantly increase your data and even provide a discounted or free home internet connection. This opens doors to online learning, job applications, and greater access to information. It's not always a simple process, but resourceful users have found that bundling these programs makes a huge difference.
Navigating Lifeline's Challenges
Finally, let's talk about the downsides. Lifeline service isn't always perfect. Dropped calls, slower data speeds, and limited customer support can happen. Here's a tip I learned from a long-time Lifeline user: contacting your provider during off-peak hours often leads to quicker, more helpful support. These limitations can be frustrating, but knowing what to expect and how to work around them can help you get the most out of the program.
To illustrate the differences, let's look at a comparison table:
Lifeline Benefits vs. Regular Phone Plans
Side-by-side comparison of what you get with Lifeline versus typical budget phone plans
| Feature | Lifeline Program | Regular Budget Plan |
|---|---|---|
| Monthly Cost | $9.25 discount (can be free with ACP) | Varies, usually higher than Lifeline |
| Data Allowance | Limited | Typically more generous |
| Voice Minutes | Can be limited | Often unlimited |
| Text Messages | Often unlimited | Often unlimited |
| Hotspot | Usually not included (can be added with ACP) | Often included with data limits |
| Customer Support | Can be limited | Varies by provider |
This table highlights the core trade-offs: lower cost with Lifeline but potentially limited data and features compared to standard budget plans. Adding ACP can bridge some of these gaps. Ultimately, Lifeline offers a valuable service for those who qualify, providing essential connectivity even with its limitations.
Qualifying Without The Runaround

This infographic shows how people qualify for Lifeline. Most qualify because of low income, but a good number are veterans or live in rural areas. It just goes to show Lifeline helps all sorts of people, not just those struggling financially.
So, you're thinking about Lifeline but a little intimidated by the eligibility process? Honestly, it's easier than you might think, especially if you know the ins and outs. I've chatted with folks who breezed through the application, and they were kind enough to share some insider tips.
Income Requirements vs. Program Participation
There are two main ways to qualify: income and program participation. If your household income is at or below 135% of the Federal Poverty Guidelines, you're good to go. But even if you're a bit over that limit, don't worry! Being enrolled in programs like SNAP, Medicaid, or Federal Public Housing Assistance automatically qualifies you, no matter your income. A friend of mine qualified through her kids' free school lunch program – sometimes it’s the little things that count.
Knowing which programs qualify can save you time and hassle. Here's a handy table summarizing the key qualifying programs and the documentation you'll need:
Qualifying Government Assistance Programs
| Program Name | Qualification Type | Required Documentation |
|---|---|---|
| Supplemental Nutrition Assistance Program (SNAP) | Program Participation | Current enrollment letter or benefits card |
| Medicaid | Program Participation | Current enrollment letter or benefits card |
| Federal Public Housing Assistance | Program Participation | Current enrollment letter or benefits card |
| Supplemental Security Income (SSI) | Program Participation | Current enrollment letter or benefits card |
| Veterans Pension and Survivors Benefit | Program Participation | Proof of benefits from the Department of Veterans Affairs (VA) |
| Tribal Programs (BIA-approved) | Program Participation | Proof of enrollment in a Bureau of Indian Affairs (BIA) approved program |
| National School Lunch Program (NSLP) | Program Participation | Proof of child's participation in free or reduced-price school meals |
This table highlights the various paths to Lifeline eligibility, making it clear that income isn't the only factor. Having this information upfront can streamline the application process.
Documentation: Your Key to Success
Here’s the potential snag: documentation. Having the right proof is crucial. For income verification, think paystubs, tax returns, or a benefits award letter. If you're qualifying through program participation, a current enrollment letter or benefit card is usually what you’ll need. One frequent mistake is submitting outdated documents. Make sure everything is up-to-date to avoid delays.
Specific Considerations: Veterans, Tribal Members, and Disabilities
Lifeline has special provisions for veterans, tribal members, and people with disabilities. Veterans can often qualify using their VA benefits documentation. For tribal members, enrollment in Bureau of Indian Affairs (BIA)-approved programs can be the key. And if you have a disability, documentation from the Social Security Administration (SSA) can help smooth the application process.
Common Mistakes to Avoid
Let's talk about some common pitfalls. Applying with incomplete information is a big one. Double-check everything before you hit submit. Another mistake is assuming your income disqualifies you automatically. Remember those program participation options! Explore every avenue before you give up. Navigating this program successfully is all about knowing the rules and playing smart.
Picking A Provider That Actually Delivers

So you've qualified for Lifeline—that's awesome! But now comes the potentially frustrating part: actually choosing a provider. There are tons of companies offering Lifeline service, and they're all trying to get your attention. How do you separate the wheat from the chaff? Trust me, I've been down this road before, and it can be confusing. Talking with other Lifeline users has shown me just how different everyone's experiences can be.
Beyond the Marketing Hype
The secret? Look beyond the flashy ads and focus on what truly matters: coverage, customer service, and hidden fees. I've heard some real nightmare stories about unreliable coverage making phones basically unusable. One person I spoke with told me their provider's customer service was so unhelpful she felt stuck. And don't forget those sneaky extra charges that can appear after you've signed up.
Evaluating Real Coverage
Don't just rely on a provider's coverage map. Chat with people in your area who actually use their service. Ask them about dropped calls, dead zones, and how fast their data speeds are. Online forums and social media are also great resources for gathering real-world feedback. Think of it like checking reviews before buying something important. You wouldn't buy a car without doing your research, would you?
Red Flags and Key Questions
As you’re researching, keep an eye out for warning signs. A lot of negative reviews, complaints about billing, and difficulty getting in touch with customer service are all red flags. When you contact potential providers, ask specific questions like: What are all the fees, including any I might not know about? How can I reach customer service, and is it easy? What happens if I go over my data limit? Their answers will tell you a lot about how much they value their customers.
Switching Providers: Timing is Everything
If your current provider isn't meeting your needs, you can switch. But timing is key to avoiding a lapse in service. Ideally, begin the application process with your new provider before your current benefit period ends. This helps minimize any interruption in service. Our guide on prepaid vs. postpaid plans can offer some helpful insights, too. Understanding these differences can make the transition much smoother.
Choosing the right Lifeline provider is essential to getting the most out of the program. By doing your homework and asking the right questions, you can find a provider that truly delivers. Don't settle for anything less than dependable service and respectful customer support—you deserve it!
Mastering The Application Process

This screenshot shows the official Lifeline program page on the FCC website—a crucial resource for accurate information. It highlights key aspects like eligibility and how to apply. Trust me, having a central, reliable source like this is a lifesaver when navigating a government program.
Applying for Lifeline can seem overwhelming, but it doesn't have to be. The key is understanding the process. I've picked up some valuable tips from people who've successfully gotten Lifeline multiple times, and I'm happy to share.
Online vs. Paper: Choosing Your Application Method
First things first: decide how you want to apply. Online is generally quicker, but if you're more comfortable with a paper application, go for it. Just make sure your handwriting is legible and double-check everything. Even a small mistake can cause delays.
Documents: Get Organized Before You Start
Before you even think about starting the application, gather all your documents. This is crucial. For income verification, pay stubs, tax returns, or benefit award letters are usually best. If you're qualifying through program participation, you'll need a current enrollment letter or your benefits card. A friend of mine told me she got approved super fast by uploading clear photos of her documents through the online portal.
Navigating the National Verifier
The National Verifier is simply a system used to confirm your eligibility. It’s basically a database check. Make sure all the information you enter matches your official records exactly. Even a minor typo in your name or address can cause a hold-up.
Troubleshooting Application Problems
What if your application gets stuck? Don't panic! Follow up! Polite persistence goes a long way. Contact the Lifeline support center or your chosen provider. They can help you figure out what's wrong and get things moving again. A common problem is missing documents. Keep copies of everything you submit! This saves you a ton of time if you need to resubmit. The Lifeline program has changed over the years. In 2012, there were around 18 million subscribers. By 2016, this dropped to under 12 million, partly due to administrative hurdles. By 2021, there were about 6.9 million subscribers. This highlights the importance of a streamlined application process. Learn more about the Lifeline program here.
The Appeals Process: Don't Give Up!
If your application gets rejected, don't give up! You can appeal the decision. Many people don't realize this. If you think you were wrongly denied, definitely appeal. Clearly explain why you believe the decision was incorrect and provide any additional documentation you have. It’s worth the effort.
Getting Lifeline is all about preparation and understanding the system. By being proactive and informed, you'll greatly increase your chances of a smooth, successful experience.
Getting Connected Without The Wait
So, you’ve been approved for Lifeline. Congrats! But now comes the sometimes-tricky part: actually getting your phone and service working. I've helped a few friends through this process, and trust me, it's not always straightforward. Let's talk realistic timelines and what to expect.
Activation: From Approval to Connection
Lifeline providers all have their own activation quirks. Some are lightning fast, others…well, let's just say patience is a virtue. I've heard stories of activations happening in 48 hours, and others taking several weeks. The activation method itself can affect the timeline. Downloading an app, calling customer service, or activating online can all have different wait times. Generally, online activation tends to be quicker if your provider offers it. If you have to call, expect a potentially longer wait.
Troubleshooting Setup Issues
Don’t be surprised by a few bumps in the road. It's pretty common. Maybe your phone doesn't show up on time, or transferring your existing number becomes a headache. I remember when my neighbor's old phone died right before her Lifeline phone arrived, and we had to scramble to save her contacts. It wasn't ideal, but we managed. The big takeaway? Contact your provider immediately if your phone doesn't arrive when expected. For number transfers, meticulously double-check that you’ve given the right info to both your old and new providers. Persistence is key!
Optimizing Your Service
Once you're up and running, you can tweak things to get the most out of your service. Think of it like fine-tuning an instrument. Running a speed test, like this one: 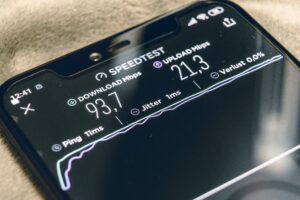 , can show you your connection quality. I've also heard from other Lifeline users who've found certain settings or apps helpful for stretching their data or improving call quality in areas with iffy coverage. Don't be afraid to experiment a little.
Practical Setup Tips For Lifeline Phones
Making the most of your Lifeline phone often comes down to managing those precious minutes and data. Over time, I’ve picked up some useful tips from other Lifeline users. One friend showed me how disabling background app updates made a huge difference in her data usage. Another helpful trick is turning off automatic downloads for photos and videos. And don't underestimate the power of free Wi-Fi! Lots of public places like libraries and community centers offer it, and there are even apps to help you locate free Wi-Fi hotspots in your area. Make these resources part of your routine. Setting up your Lifeline phone isn’t always a walk in the park, but with a little patience and these practical tips, you’ll be staying connected in no time.
Keeping Your Benefits Active
So, you got approved for Lifeline. Awesome! But here's the inside scoop: staying enrolled is a whole other ballgame. The yearly recertification process trips a lot of people up, and it's heartbreaking to see folks lose their benefits unnecessarily. I've seen it happen, and trust me, it's avoidable. Let's talk about how to avoid those common pitfalls.
Understanding Recertification
First things first, let's talk about why recertification is even a thing. The Lifeline program aims to help those who truly need it. Annual recertification makes sure the benefits keep going to the right people. It also gives you a chance to update your info if anything's changed – like a new address or phone number.
Life throws curveballs, right? Moving, landing a new job, or changes in your household income can all affect your eligibility. Report these changes ASAP! Don’t wait for your recertification date. One mistake I've seen is people thinking any income increase automatically disqualifies them. Not true! If you qualify through a program like SNAP or Medicaid, a small income bump might not matter.
Documentation: Your Lifeline to Continued Benefits
Just like when you first applied, recertification needs the right paperwork. The exact documents might be different depending on your state and provider, so check with your provider or the Lifeline website. Pro tip: keep digital copies of all your important documents. This makes recertification so much easier. Everything’s right there when you need it.
Navigating Challenges and Finding Support
Even when you dot every "i" and cross every "t", things can still go sideways. Maybe your recertification gets delayed, or your benefits are mistakenly terminated. Don’t panic! There are resources to help. Many Lifeline providers have dedicated support staff for recertification issues. There are also advocacy groups and legal aid organizations that know the Lifeline program inside and out. Don't hesitate to reach out – they're there to help! Check out this resource: 5G APN Settings for more information.
Real-World Examples: Staying Connected
I know someone who almost lost their Lifeline service because they moved and forgot to update their address with their provider. They caught it just in the nick of time! Another friend had their benefits stopped for no good reason. They appealed the decision and got their service back. These stories just show how important it is to stay informed and proactive. Keeping your Lifeline benefits active takes a little effort. By understanding the rules, staying organized, and knowing where to find help, you can stay connected without a hitch.
Maximizing Your Lifeline Experience
So, you've got your Lifeline service. Awesome! But getting the most out of it takes a bit of savvy. Think of it like getting the most bang for your buck – you want every minute and megabyte to work for you. I've learned a few tricks from other Lifeline users, and they're real difference-makers.
Stretching Your Data and Minutes: Tips From the Pros
A friend of mine showed me how turning off automatic app updates in her phone settings really cut down on her data usage. She also turns off background data for apps she doesn't use often. These small changes can make a big difference. Another Lifeline user I know swears by data-saving browsers like Opera Mini. They compress web pages, making your data go further.
And don't underestimate the power of free Wi-Fi! Libraries, coffee shops, and even some fast-food places offer it. Downloading a Wi-Fi finder app can help you spot hotspots wherever you go. One user I know downloads podcasts and ebooks on public Wi-Fi so she can enjoy them offline without touching her Lifeline data.
Combining Lifeline with Other Resources
Lifeline is a fantastic foundation, but it doesn't have to be your only communication tool. Combining it with other assistance programs can create a more complete solution. The Affordable Connectivity Program (ACP) is a perfect example. It can provide extra data or even discounted home internet, which works great alongside your Lifeline mobile service. Check with your local community centers and social service organizations. They often have information on free or low-cost internet programs and other helpful resources.
Managing Your Plan and Knowing Your Rights
Keep an eye on your usage. Many Lifeline providers have online portals or apps that let you track your minutes and data. This helps avoid overage charges and stay within your limits. And remember, as a Lifeline participant, you have rights. If you feel you're not getting the service you should be, contact your provider. If they're not helpful, reach out to the Lifeline support center or a consumer advocacy group.
Upgrading and Transitioning: Planning for the Future
As things get better for you, you might want to upgrade your service or move on from Lifeline altogether. Most providers offer a variety of plans, so you can increase your data or minutes as needed. When you're ready to leave the program, just contact your provider to cancel your service. They'll walk you through the process.
Making the most of your Lifeline experience is all about being resourceful and proactive. By using these practical tips and staying informed about available resources, you can build a communication plan that really works for you.
Ready to learn more about wireless options and helpful resources? Check out Transit Wireless Wifi for more expert advice.
Article created using Outrank