
So you’re all set with your new TruConnect phone, and then bam – no internet? I’ve been there too. You see, sometimes it’s not enough to have the right device or plan; you must confirm everything’s set up properly. And that includes something called the APN settings.
Overview of Steps to Access APN Settings (Note Final Settings are in a chart further below)
| Device | Steps |
|---|---|
| Android | 1. Navigate to ‘Settings’ 2. Find ‘Wireless & Networks’ 3. Choose ‘Mobile Networks’ 4. Then ‘Access Point Names’ 5. Add or modify using the Truconnect detailed APN settings provided in the article. |
| iPhone | 1. Go to ‘Settings’ 2. Next is ‘Cellular’ 3. Then ‘Cellular Data Options’ 4. Tap on ‘Cellular Network’ 5. Adjust accordingly with TruConnect APN settings provided in the article |
I will dive deep into setting up these crucial TruConnect APN settings so that you can browse smoothly without any hitches below.
Step-by-Step Guide to Accessing and Changing APN Settings for Android
I’m here today to help you navigate the sometimes tricky waters of accessing and changing your APN settings on your Android device. It’s a breeze once you learn how!
First off, let me tell you what an APN is. It stands for Access Point Name. This little guy is super important because it links your phone with the internet via your mobile data network. Those settings must be right if TruConnect is your service provider.
Okay, enough chit-chat! Let’s dive in!
Step 1. First, grab your Android phone and head to the Settings menu.

Step 2. Now scroll down until you find Wireless & Networks or Connection, depending on your phone model.

Step 3. Next up is Mobile Networks. Click on that!
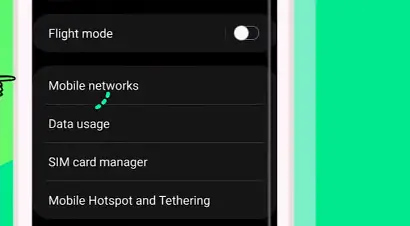
Step 4. You’ll see an option called Access Point Names; tap that too.
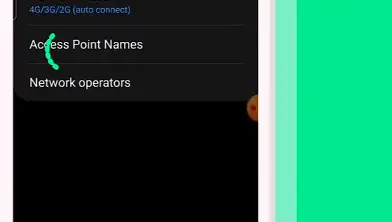
Voila! You’re now looking at all the APN settings currently on your device.
Now if we want to change these settings or add new ones for TruConnect:
- Hit that plus sign (+) or click “Add New APN.”
- Fill in the fields with TruConnect’s specific details (I’ll drop those below).
- Save everything by hitting the three dots in the corner and selecting ‘Save.’
And there we have it – job done!
The specific TruConnect APN Settings are:
| Setting | Value |
|---|---|
| Name | AirTalk |
| APN | Reseller |
| Proxy | (Blank) |
| Port | (Blank) |
| Username | (Blank) |
| Password | (Blank) |
| Server | (Blank) |
| MMSC | http://mmsc.mobile.att.net |
| MMS Proxy | proxy.mobile.att.net |
| MMS Port | 80 |
| MCC | 310 |
| MNC | 410 |
| Authentication Type | (Blank) |
| APN Type | default, supl, mms, fota |
| APN Protocol | IPv4/IPv6 |
| APN Roaming Protocol | IPv4/IPv6 |
| APN enable/disable | enabled |
| Bearer | (Unspecified) |
| MVNO | (none) |
Remember, getting these details right is crucial, so ensure they match exactly what I’ve written above.
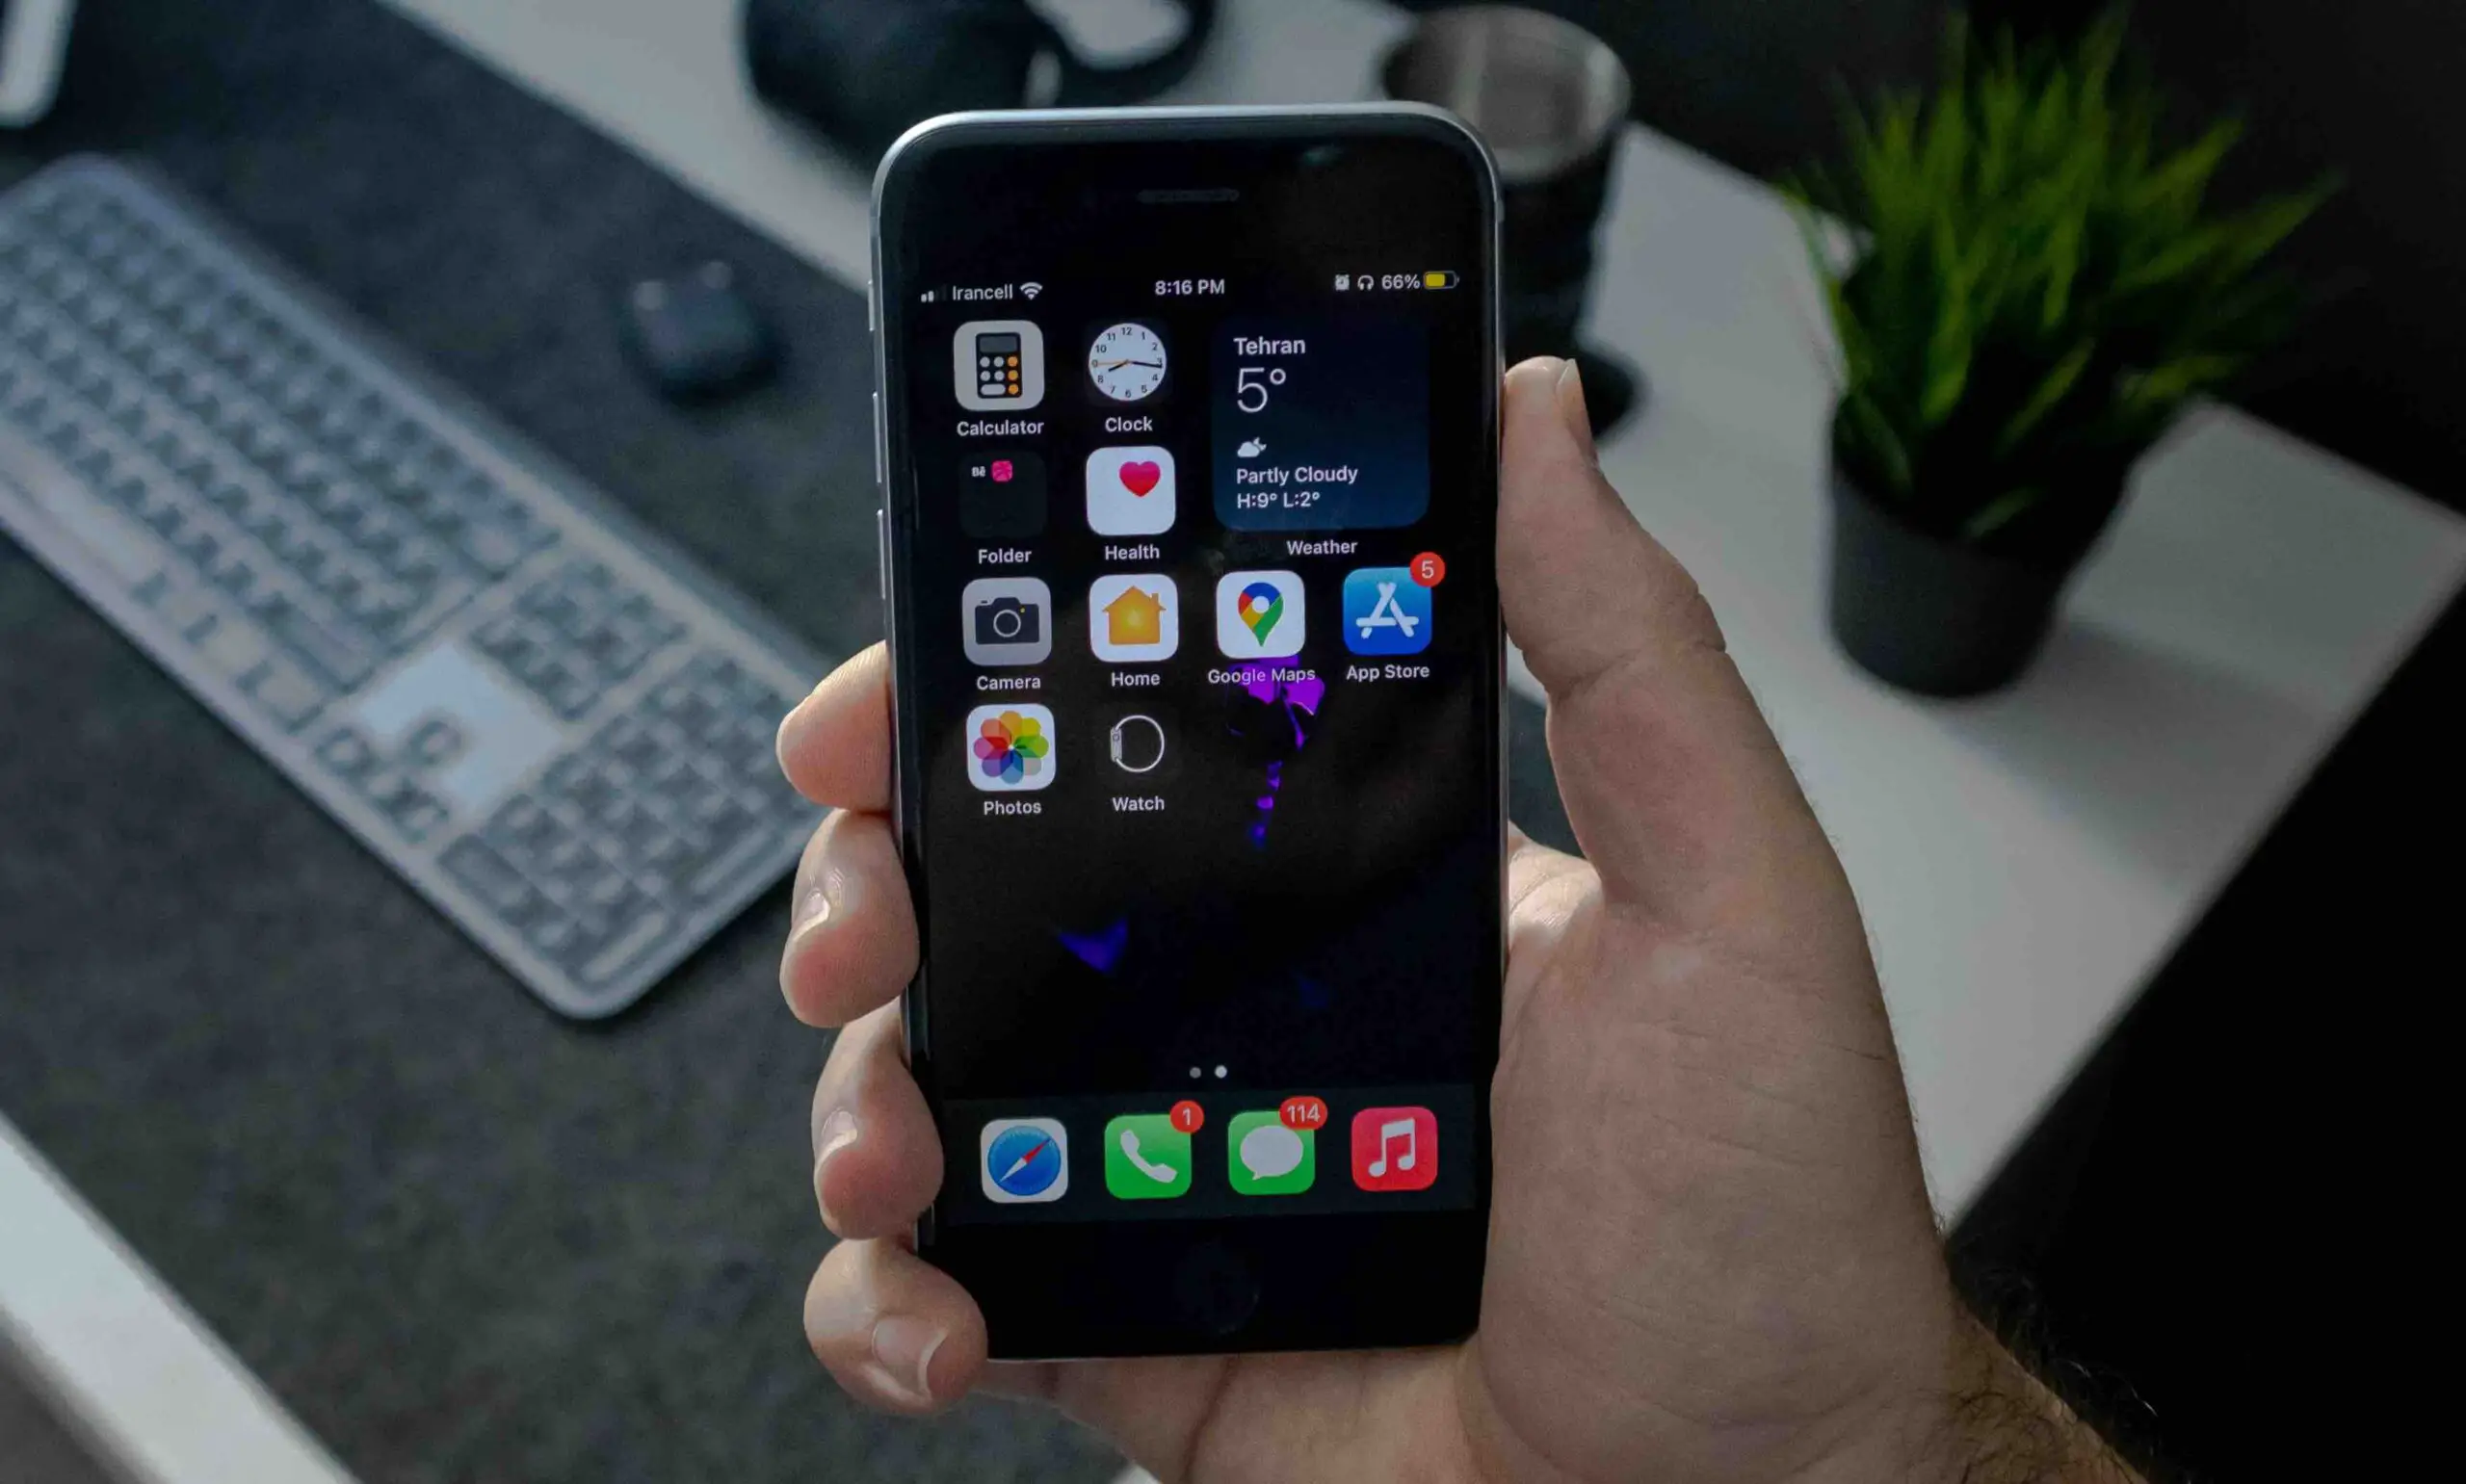
Step-by-Step Guide to Accessing and Changing APN Settings for iPhone
So, you’ve got your hands on an iPhone and want to change the APN settings for TruConnect? I’m still here with a step-by-step guide to make this process as easy as pie.
Let’s get down to business. Here’s how you can access and change these settings:
Step 1. Tap on Settings – It’s the gray gear icon that is likely hanging out on your home screen.
Step 2. Once you’re in there, hit Cellular. You’ll find it towards the top of your screen.
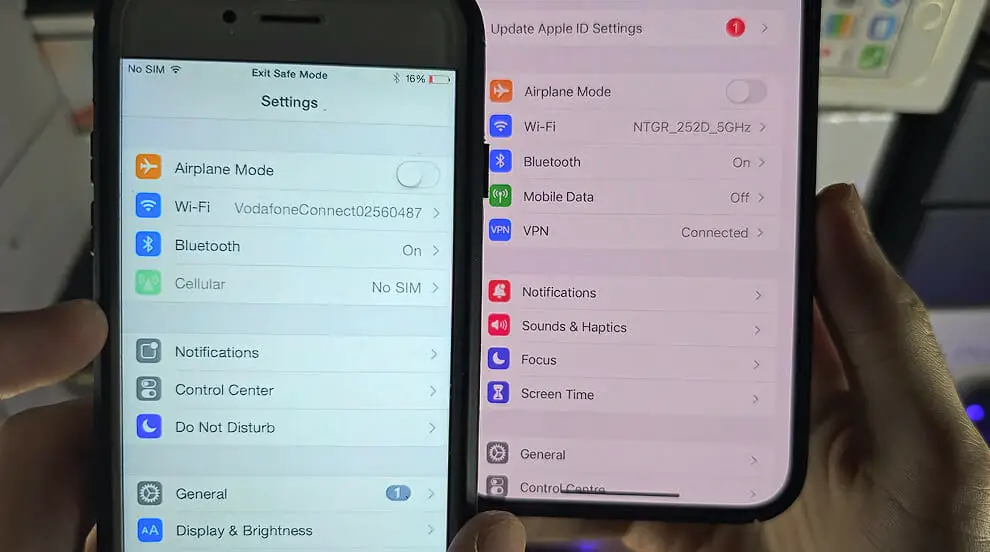
Step 3. Next is Cellular Data Options or Mobile Data Networks. Tap on that bad boy!
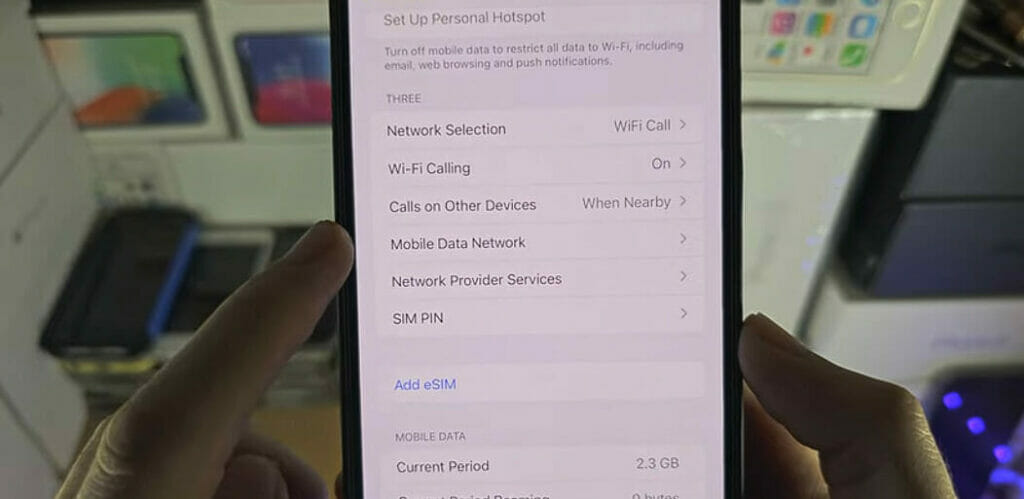
Step 5. Finally, tap on APN Setting.
Now that we’ve accessed our APN settings let me guide you through changing them for TruConnect:
| Setting | Value |
|---|---|
| APN | Reseller |
| Username | (Blank) |
| Password | (Blank) |
For AirTalk Wireless MMS Settings
| Setting | Value |
|---|---|
| APN | Reseller |
| Username | (Blank) |
| Password | (Blank) |
| MMSC | http://mmsc.mobile.att.net |
| MMS Proxy | proxy.mobile.att.net |
| MMS Max Message Size | 1048576 |
| MMS UA Prof URL | www.apple.com/mms/uaprof.rdf |
And voila! You’ve successfully changed your iPhone’s TruConnect APN Settings!
Common Issues with APN Settings and Their Fixes
Now that we’ve covered what TruConnect APN settings are all about, let’s dive into some common issues you might run into when messing around with these settings. Don’t worry; I’ll also share some handy fixes to get you back on track.
Issue # 1. Incorrect APN settings. This is a classic! If your internet isn’t working despite having network coverage, chances are you’ve got the wrong APN settings. The fix? Easy peasy – go to your device’s settings and ensure they match TruConnect exactly as it appears here.
Issue # 2. Now, onto something a bit trickier – No MMS. If you cannot send or receive picture messages (MMS), this could be due to incorrect MMSC settings in the APN configuration. To fix this, ensure the MMSC field has been filled out correctly with http://mmsc.mobile.att.net.
Issue # 4. Data connection is dropping frequently. This can happen if your phone constantly switches between 2G/3G/4G networks due to poor signal strength or network congestion. A quick remedy would be turning off automatic network selection and manually selecting 3G or 4G based on which one offers better connectivity in your area.
If all fails, try rebooting your phone or resetting your network. Just have a backup, as you might lose some important data settings.
When you reset these settings, you’ll revert your network configurations to their original defaults. Wi-Fi networks, Bluetooth connections, VPN settings, and cellular settings will all be wiped, but no personal data, like apps or photos, will be removed.
Here’s how you can reset network settings on two popular mobile operating systems:
iPhone (steps might vary slightly depending on manufacturer and version)
- Go to the
Settingsapp. - Scroll down and select
General. - Scroll to the bottom and tap
Reset. - Tap
Reset Network Settings. - You’ll be prompted to enter your passcode if you have one.
- Confirm the reset.
Android (steps might vary slightly depending on manufacturer and version)
- Open the
Settingsapp. - Scroll down and select
System(or “General management” on some devices). - Tap
ResetorReset options. - Select
Reset Wi-Fi, mobile & BluetoothorReset network settings. - Tap
Reset Settingsor a similar confirmation option. - If prompted, enter your device PIN or password.
- Confirm the reset.
Remember, technology isn’t perfect, and sometimes things go awry even when we think we’ve done everything right! So keep calm and troubleshoot!
References
Organizations:
- GSMA. https://www.gsma.com/
Websites:
- Google Fi Wireless Help. https://support.google.com/fi/?hl=en
- How-To Geek. https://www.howtogeek.com/
Video References:
48 Mobile
Alfve