

Have you ever struggled with your mobile device not connecting to the internet, even though you’ve got a solid data plan? I have. And let me tell you, it’s frustrating as heck.
The key might lie in your Access Point Name (APN) settings. It is a gateway between cellular networks and the internet. Essential for web browsing, MMS, and overall device performance, correct APN settings ensure optimal connectivity. However, carrier switches, software updates, or using unlocked phones may require APN tweaks. Unlocking these settings can resolve many network issues.
Let’s go into detail below.
Why Might You Need to Unlock Your APN Settings?
There are moments when these settings might be inaccessible or grayed out, prompting the need to unlock them. Here’s why you might need to do so:
General Reasons:
- Carrier Switch: If you’ve shifted from one mobile service provider to another, you might find that your data isn’t working as it should. This could be due to the device clinging to the old carrier’s APN settings.
- Using an Unlocked Phone: Purchasing a device previously tied to a particular network or unlocking a network-locked phone might require APN adjustments to ensure compatibility with your current carrier.
- Connectivity Issues: If you’re experiencing problems accessing the internet, sending multimedia messages (MMS), or facing intermittent network drops, it might be an APN issue.
- Trying MVNOs: Mobile Virtual Network Operators rent space from larger networks and often require manual APN settings input to grant internet access.
For iPhone:
- Software Update: A recent iOS update might sometimes change or reset APN settings, necessitating a revisit.
- Restored Devices: If you’ve restored your iPhone from a backup, it might carry over APN settings from the previous device that may not be compatible.
For Android:
- Firmware Updates: Certain Android updates might reset or alter APN settings, especially if they’re geared toward system optimization.
- Multiple User Profiles: Some Android devices allow multiple user profiles, and switching between them might affect APN access.

Methods to Unlock APN Settings on Different Devices
Navigating the complexities of modern mobile devices can sometimes leave users puzzled, especially when faced with terms like “APN settings.” While the phrase might sound technical and intimidating, understanding its essence can dramatically enhance your device’s performance.
Let’s delve into the different methods to unlock APN on our devices:
For iPhones:
Method 1: Restart Your Device
One of the simplest yet effective ways to troubleshoot your iPhone is by performing a basic restart. This allows the system to recalibrate and iron out minor glitches.

Step 1: Press and hold the side or top button until the power off slider appears.

Step 2: Drag the slider, then wait a few moments for the device to turn off.

Step 3: Press the side or top button again until the Apple logo appears.
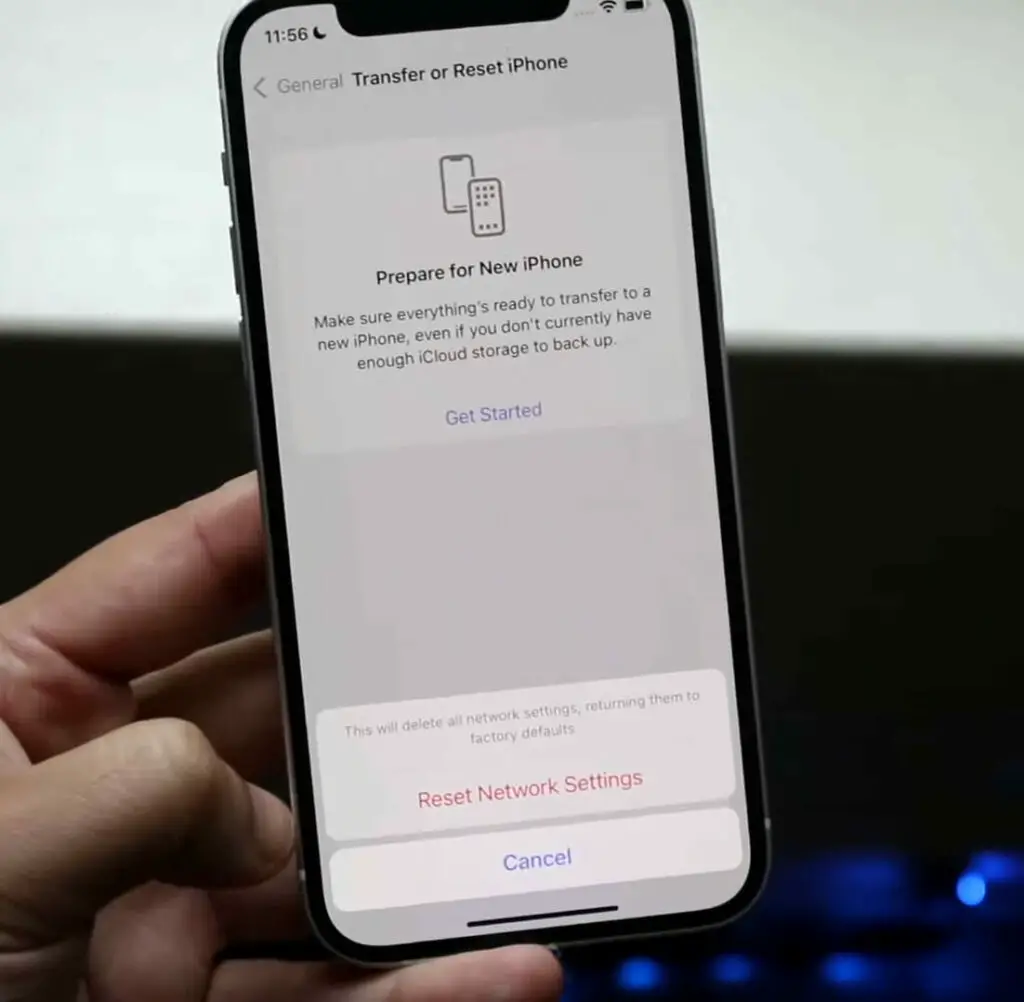
Method 2: Reset Network Settings
Resetting network settings can solve many connectivity issues by restoring all network-related functionalities to factory defaults.

Step 1: Open the ‘Settings’ app.
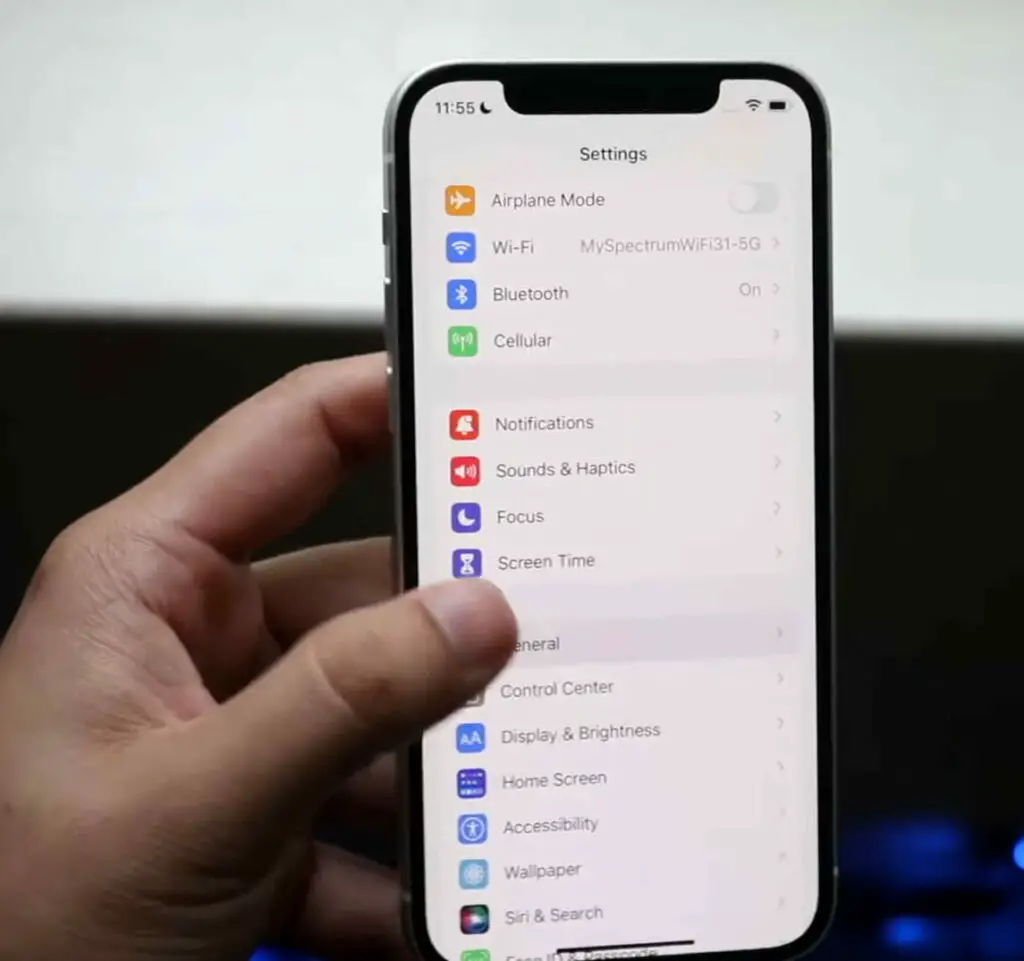
Step 2: Go to ‘General’
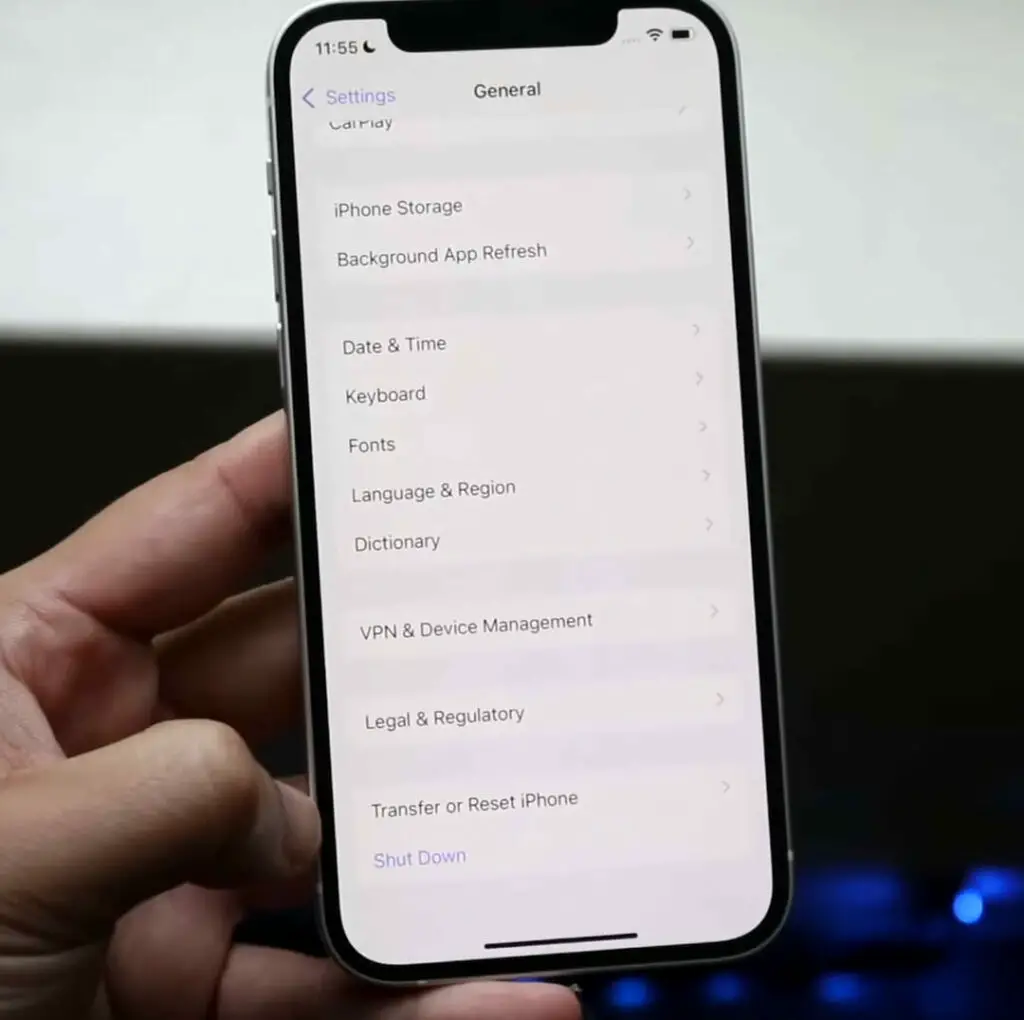
Step 3: Click on ‘Transfer or Reset iPhone.’
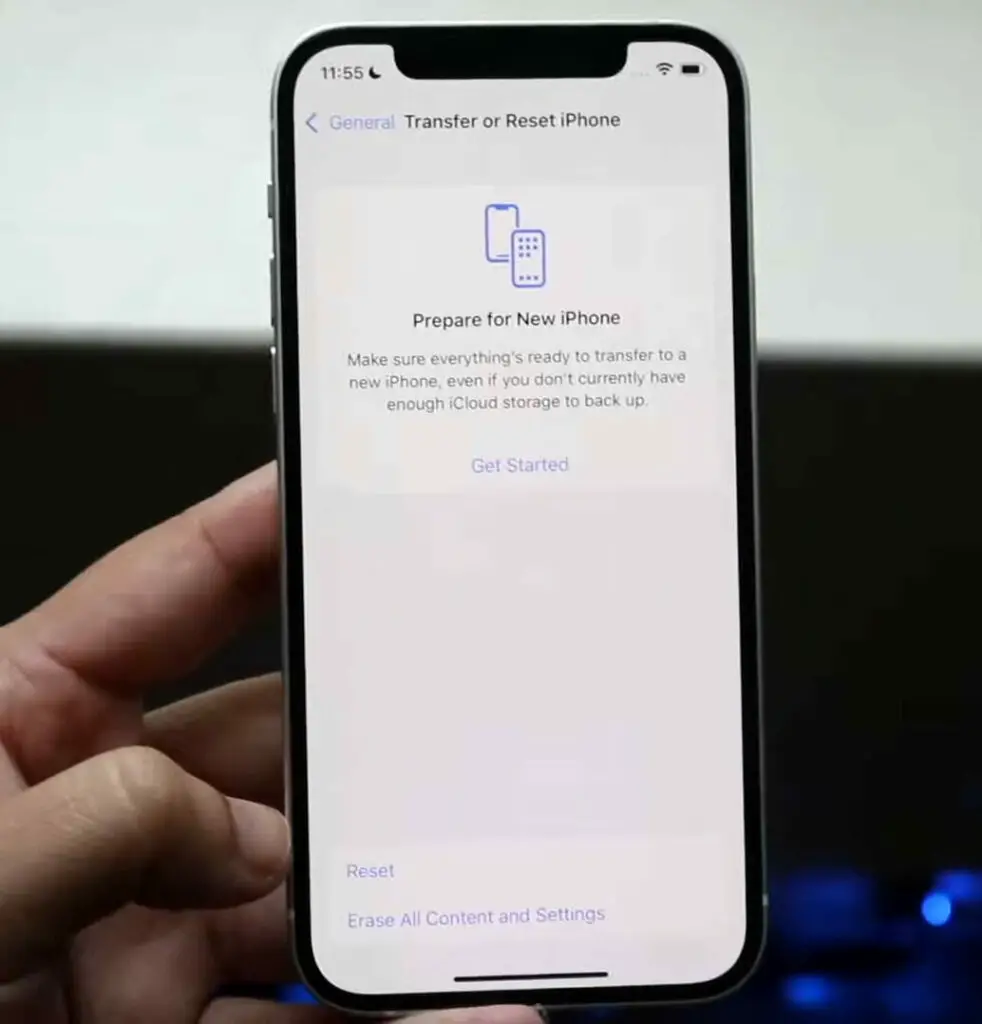
Step 4: Tap on ‘Reset’
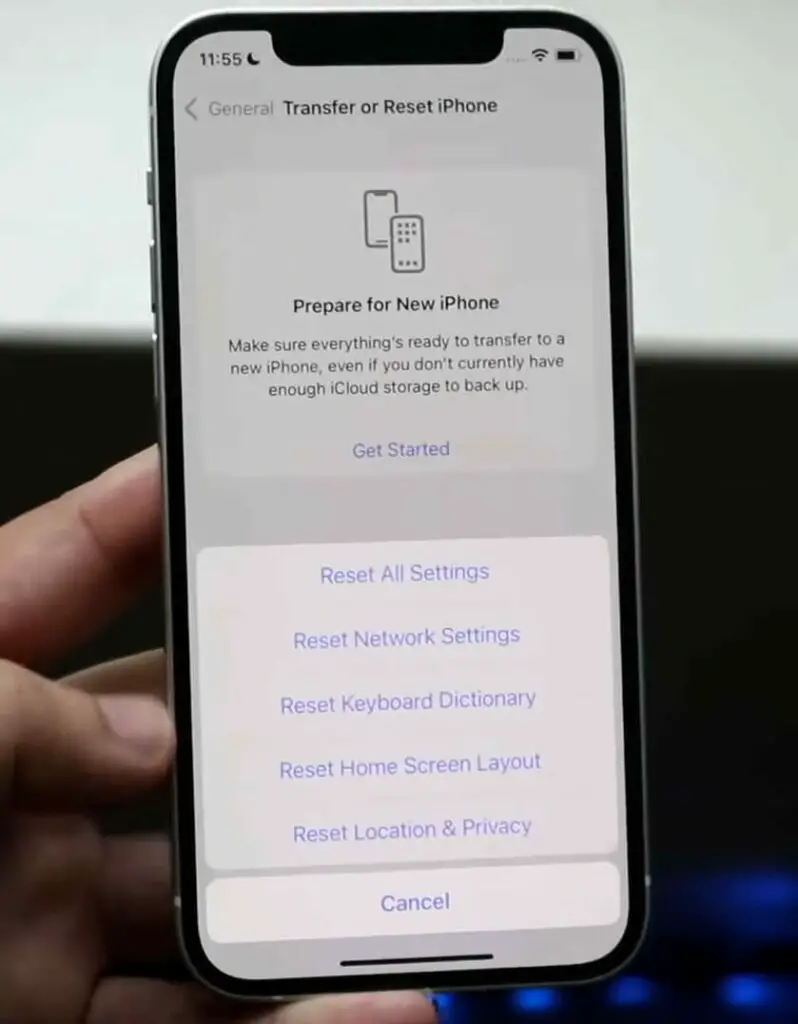
Step 5: Tap on ‘Reset Network Settings’. You might need to enter your passcode.
Step 6: Confirm when prompted. The device will restart.
Method 3: Upgrade iOS
Keeping your iOS up to date ensures you benefit from Apple’s latest enhancements and fixes, which can resolve underlying software issues.

Step 1: Connect your device to Wi-Fi.

Step 2: Go to ‘Settings’

Step 3: Click on ‘General’
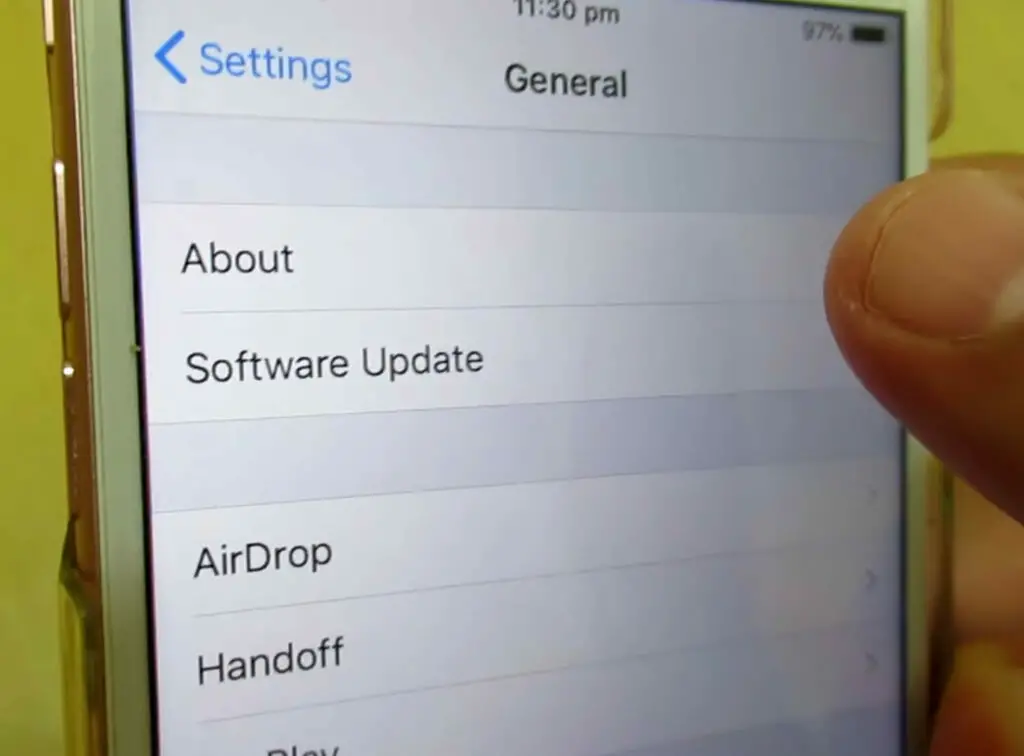
Step 4: Choose ‘Software Update’.
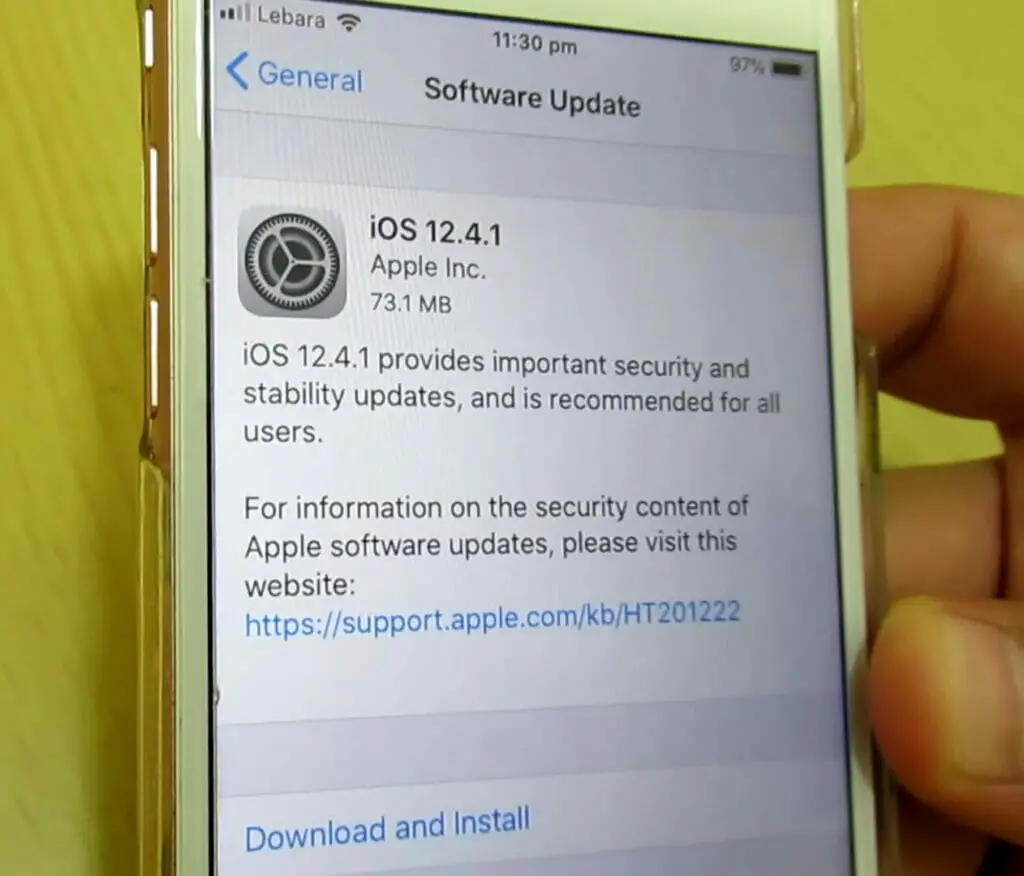
Step 5: Tap ‘Download and Install.’
Method 4: Carrier Update
Mobile carriers periodically release updates to optimize connectivity, improve performance, and resolve network-specific bugs. Checking for these updates can often alleviate common network concerns.
Step 1: Make sure your device is connected to Wi-Fi.

Step 2: Go to ‘Settings’
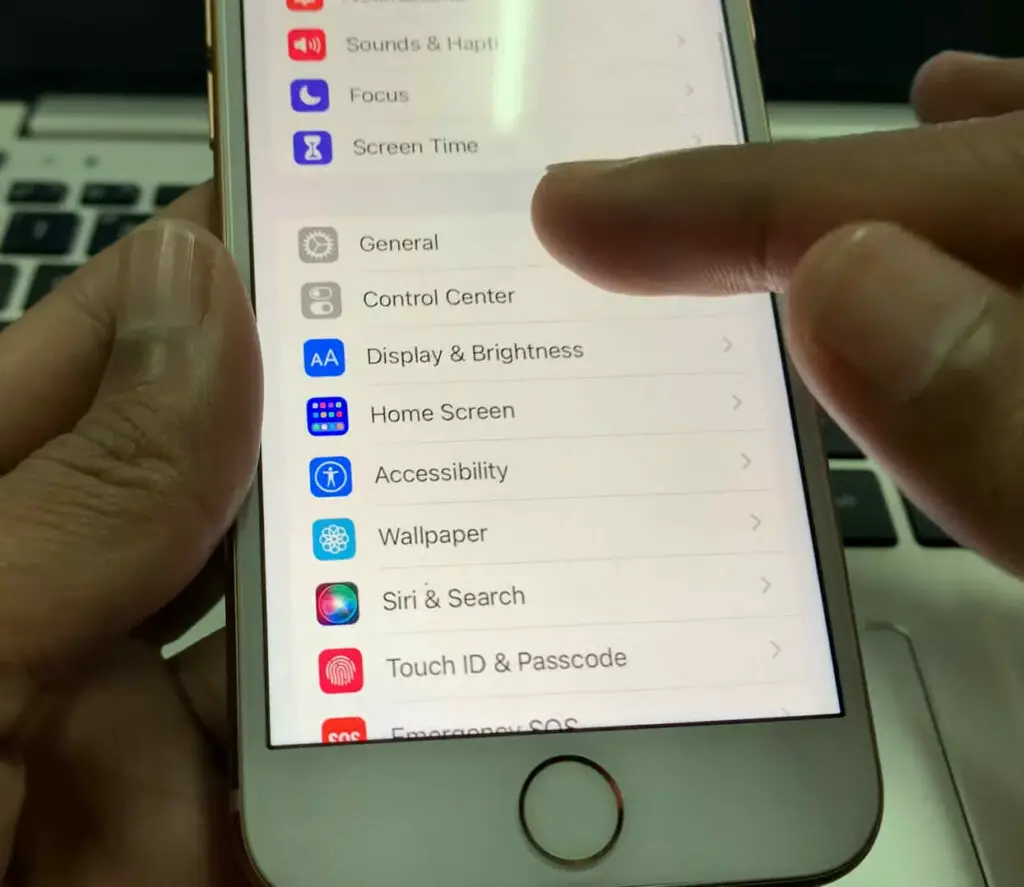
Step 3: Choose ‘General’
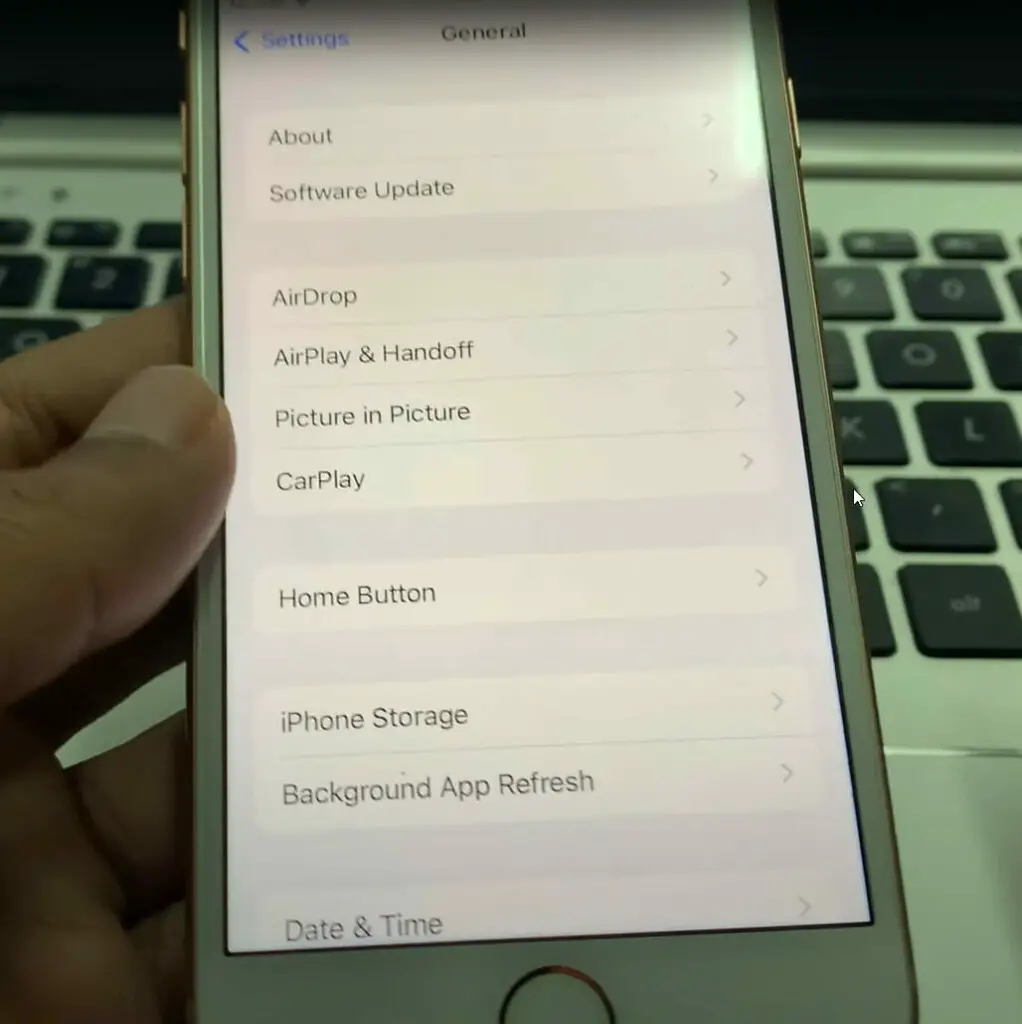
Step 4: Tap on ‘About.’

Step 5: You’ll receive a notification if an update is available.
Method 5: Jailbreaking
For those seeking greater control and customization over their iOS device, jailbreaking provides an avenue to unlock advanced features, but it comes with challenges and risks.

Step 1: Research trusted jailbreaking methods specific to your device model and iOS version.

Step 2: Back up your device using iTunes.
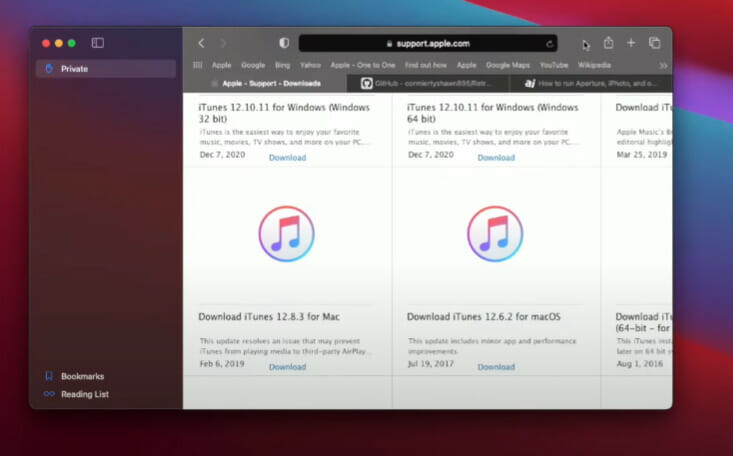
- Update iTunes: Ensure you have the latest version of iTunes installed.

- Connect Your iOS Device: Use a USB cable to connect your device to your computer.

- Select Your iOS Device in iTunes: Click on the device icon in the top left menu of iTunes.
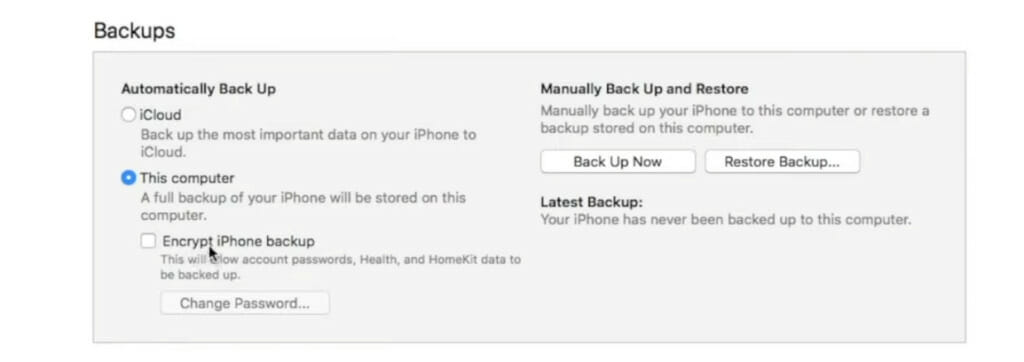
- Backup Selection: In the “Backups” section, choose “This Computer.” Encrypt the backup if you want to save Health and Activity data.
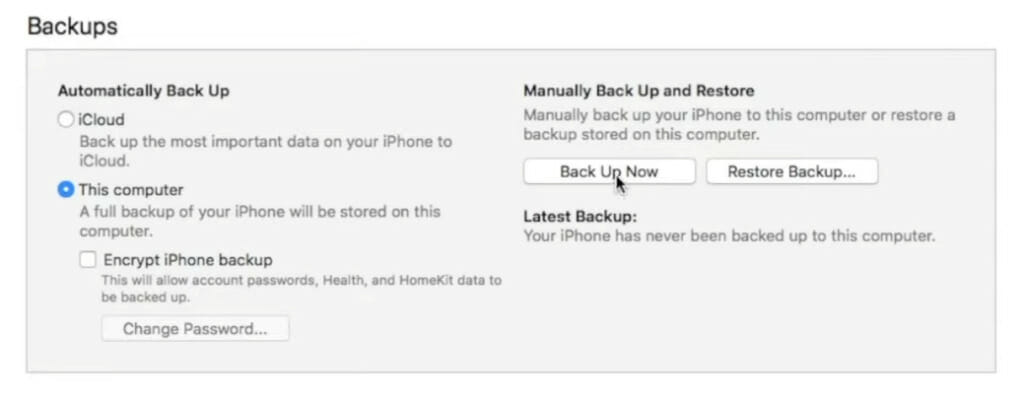
- Start the Backup: Click “Back Up Now.”
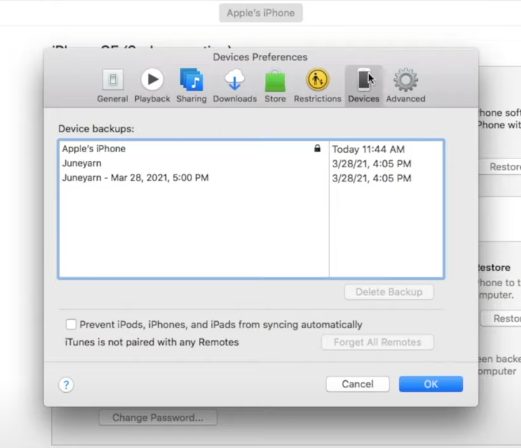
- Verify the Backup: Navigate to iTunes Preferences > “Devices” to see the date and time of the last backup.

Step 3: Follow the selected jailbreak method’s step-by-step instructions, typically provided on the official jailbreak tool’s website.
For Android Devices:
Method 1: Restart Your Device
Like its iOS counterpart, Android devices can benefit immensely from a quick restart, refreshing its processes and potentially addressing minor software hiccups.

Step 1: Press the power button until the power menu pops up.

Step 2: Tap on ‘Restart’ or ‘Reboot.’ The device will power cycle.
Method 2: Third-party Apps
The flexibility of Android allows users to utilize specialized apps from the Play Store, which can be instrumental in tweaking and accessing hidden settings.

Step 1: Open the Google Play Store.
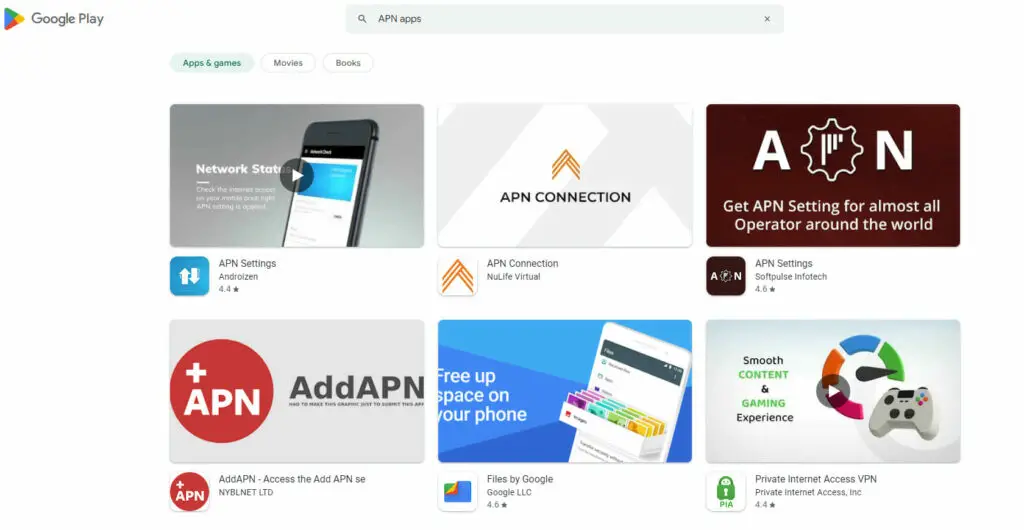
Step 2: Search for the desired app (e.g., ‘APN Settings’).
Step 3: Install the app, open it, and follow the on-screen instructions.
Method 3: Upgrade Your OS
Operating System updates can bring new features, optimizations, and bug fixes. Conversely, reverting to a previous version might be the solution if a new update seems to cause more problems than it solves.

Step 1: Connect to Wi-Fi.
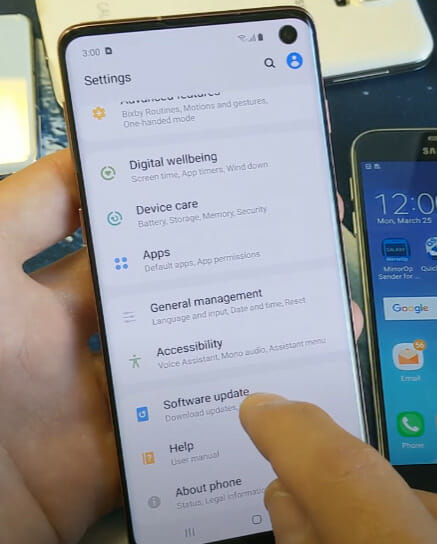
Step 2: Go to ‘Settings’ > About phone

Step 3: Choose ‘Software update.’
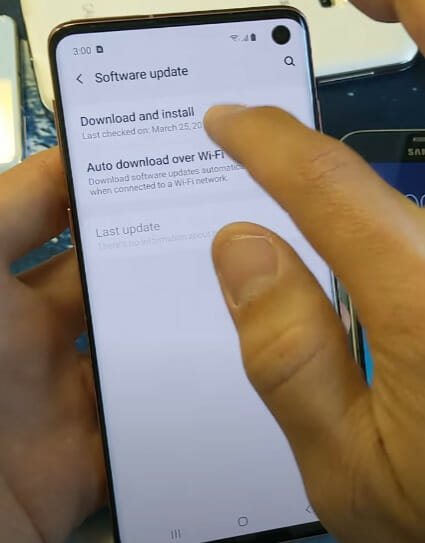
Step 4: Tap ‘Download and Install’ if an update is available.
Method 4: Developer Options
Operating System updates can bring new features, optimizations, and bug fixes. Conversely, reverting to a previous version might be the solution if a new update seems to cause more problems than it solves.

Step 1: Go to ‘Settings’
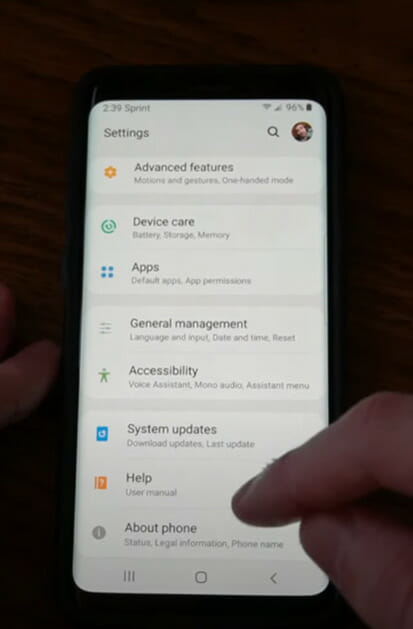
Step 2: ‘About phone.’
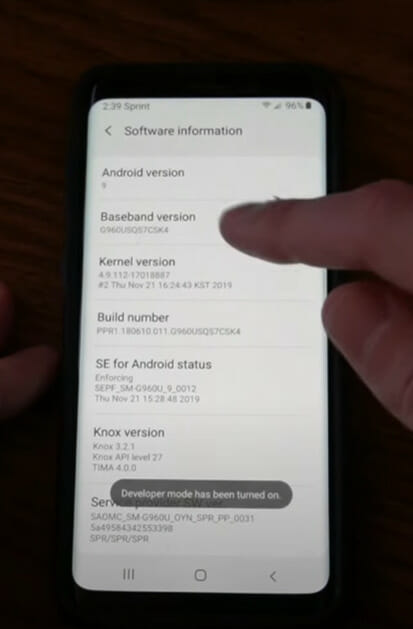
Step 3: Find ‘Build number’ and tap on it multiple times quickly until you see a prompt that says, “Developer mode has been turned on.”
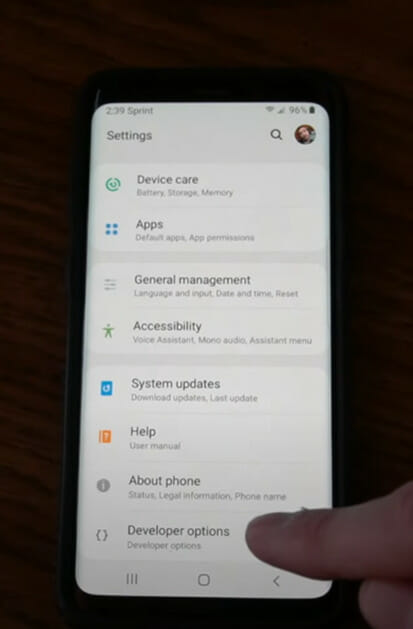
Step 4: Go back to the main ‘Settings’ menu, and you should see a new option called ‘Developer options.’ Here, you can adjust various system settings.
Method 5: Rooting
Rooting is to Android what jailbreaking is to iOS. It grants users root access to the system, offering unparalleled control and customization, but not without its fair share of risks.

Step 1: Research a trusted rooting method for your device model and Android version.
Step 2: Back up your data.

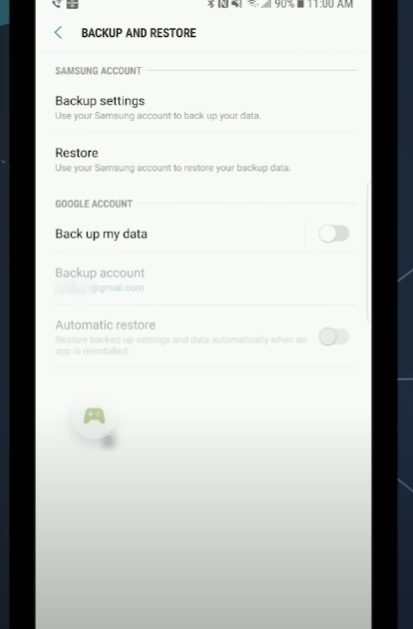
- Go to “Settings”
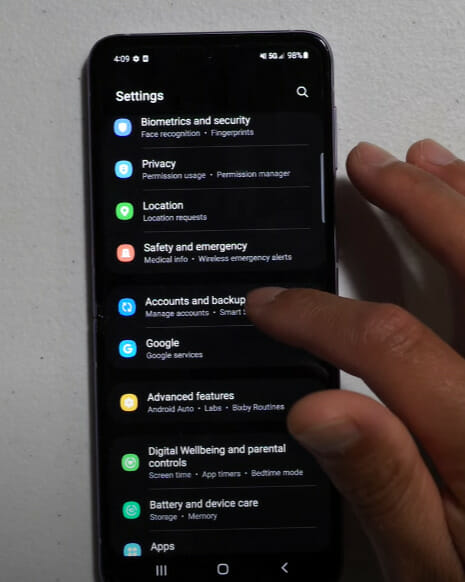
- Then click on “Accounts and back up.”
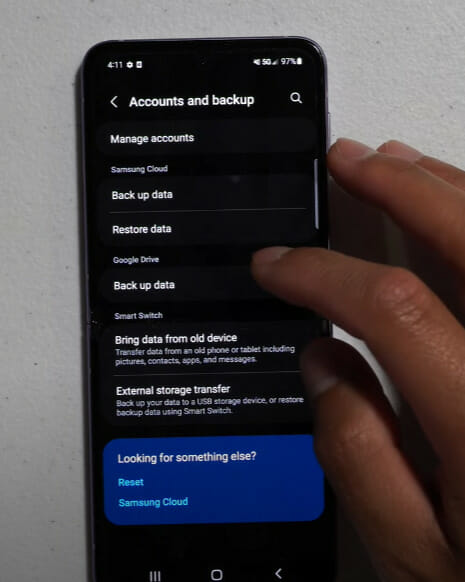
- Choose “Backup.” Ensure the backup service is on and select “Back up now.”

Step 3: Install required tools, such as ADB, Fastboot, and specific rooting software.
Step 4: Follow the selected rooting method’s step-by-step instructions. This often involves connecting the device to a PC, booting into a specific mode, and running the rooting tool.
Here’s the comprehensive comparison table detailing key aspects of both operating systems.
Comparison Table:
| Feature/Method | iOS | Android |
|---|---|---|
| Restart Device | Rooting – Offers root access for customization and system tweaks; also voids warranty. | Easily accessible through the power button. |
| Reset Network Settings | Easily accessible through the power button. | Easily accessible through the power button. |
| System Update | Found in ‘Settings’ > ‘General’ > ‘Software Update’. | Found in ‘Settings’ > ‘About phone’ > ‘Software update.’ |
| Carrier Update | Found in ‘Settings’ > ‘General’ > ‘About.’ | Often pushed automatically or through carrier apps. |
| System Modification | Rooting – Offers root access for customization and system tweaks; also voids warranty. | Connectivity issues, potential security vulnerabilities, warranty concerns. |
| Third-Party Apps for APN | Limited availability due to system restrictions. | Available in Play Store; check for trusted developers. |
| Developer Options | Not present as in Android. | Connectivity issues, potential security vulnerabilities; warranty concerns. |
| Risks with APN Changes | Connectivity issues, potential security vulnerabilities, warranty concerns. | Same as iOS, plus some device-specific risks. |
Risks and Precautions
Modifying your APN settings requires caution. Mistakes can lead to connectivity issues or even security vulnerabilities. Here are some key risks:
- Incorrect adjustments can hinder internet or MMS functions.
- Unauthorized alterations may void your device’s warranty.
- You might open your device to potential security threats.
Safe practices include:
- Researching before making any changes.
- Relying on credible sources for APN data.
- Backing up existing settings for easy restoration.
Troubleshooting Section
When adjusting your APN settings, you may encounter various issues or difficulties. Here’s a quick troubleshooting guide to common problems:
- APN Settings Grayed Out: If you cannot access or modify your APN settings, it might be because your carrier has locked them. Contact your service provider for assistance.
- Can’t Connect After APN Adjustment: Double-check for any typos or incorrect values if you adjusted your APN settings and still can’t connect. If uncertain, restore the settings to their original values or contact your carrier.
- MMS Not Sending/Receiving: This can be due to incorrect MMS gateway settings in your APN configuration. Ensure they match the ones provided by your carrier.
- Data Speeds Slow After APN Changes: Ensure you’ve selected the correct data type (e.g., LTE, 4G, 3G) for your device and network capabilities. Adjusting these values improperly can slow down your connection.
- Settings Don’t Save: Some devices might not save your changes due to software glitches. Consider restarting your phone or trying a different method to access the settings.
Frequently Asked Questions:
- What does APN stand for?
- APN stands for Access Point Name. It’s the information your device uses to connect to the internet using a cellular network.
- Why is my device not connecting to the internet despite having data?
- Your device’s APN settings may be outdated or incorrect. Adjusting these settings can often resolve connectivity issues.
- Do I need to adjust APN settings every time I switch carriers?
- Not necessarily, but it’s recommended. Different carriers may have unique APN settings, so updating them ensures optimal connectivity.
- Can I mess up my phone by changing the APN settings?
- Incorrect APN settings can lead to connectivity issues, but they won’t physically damage your device. Always back up current settings so you can restore them if necessary.
- Will changing my APN settings use more data?
- No, adjusting APN settings doesn’t increase data usage. However, the right settings can help optimize data usage, ensuring apps use only what’s necessary.
- Is it possible to boost my phone’s battery life with the right APN settings?
- Yes! Correct APN settings can minimize the power drain caused by your device repeatedly attempting to establish a connection.
- I can send texts but not multimedia messages. Why?
- This issue might be due to incorrect APN settings associated with MMS. Adjusting these can resolve the problem.
- Are there any security risks in adjusting APN settings?
- You risk exposing your device to security threats if done incorrectly or sourced from unreliable places. Always rely on credible sources for APN data.
- Can I use a third-party app to adjust APN settings on my Android device?
- Yes, there are reputable apps on the Play Store that can help configure or modify APN details. However, ensure the app is from a trusted developer.
- My carrier sent a settings update for my iOS device. Should I accept it?
- Yes, carriers occasionally send updates to auto-configure APN settings. Accepting these updates ensures your device is optimized for their network.
References
Website Resources:
- GSMA. https://www.gsma.com/
- Android Authority. https://www.androidauthority.com/
- iMore. https://www.imore.com/
Video References:
World of Tech
LoFi Alpaca
ARYAN Phones
iAppleTech
Tech Ex
Jacob Drozh
Fix369
lapfix
jaewanthefinessekid6557
CNET
HardReset.Info
World of Tech
Lucky Tech Life
PC World
androidflashtech
Simple Alpaca
Your Six Studios